RMAN Database Restore ASM

RMAN Database Restore ASM

Description:
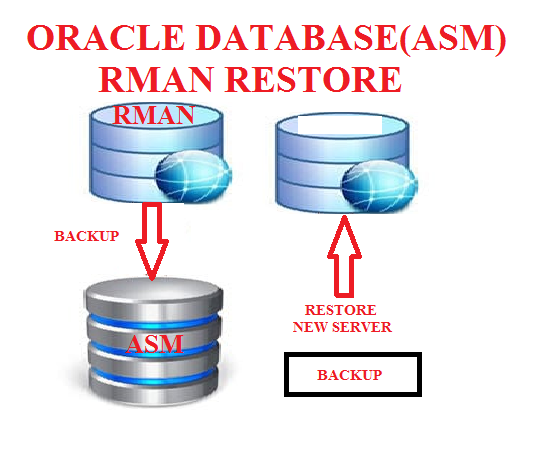
In this blog, we are going to see take RMAN backup in asm storage and restore the database to another server.

RMAN Restore ASM:
Take the backup using RMAN in source host copy the backup into destination host, using that backup files to restore the database.

Overall Steps:

Source server:
1. Backup Database using RMAN
2. Create pfile from spfile
3. Copy the backup files to the destination server

Destination server:
1. Edit pfile
2. Create Required Folders in destination server
3. Add the database entry in oratab
4. Startup using pfile Nomount stage
5. Restore control file
6. Mount database
7. Catalog backup pieces
8. Restore and recover the database
9. Change dbname/DBID uisng NID
10. verify the database name and id.

Source Server:

Step 1: Take backup using RMAN:

Create backup directory:

Backup script:
run {
allocate channel t1 type disk;
backup incremental level 0 database format ‘/u01/share/backup/database_%d_%u_%s’;
release channel t1;
}
sql ‘alter system archive log current’;
run {
allocate channel a1 type disk;
backup archivelog all format ‘/u01/share/backup/arch_%d_%u_%s’;
release channel a1;
}
run {
allocate channel c1 type disk;
backup current controlfile format ‘/u01/share/backup/Control_%d_%u_%s’;
release channel c1;
}
exit

Connect RMAN and execute the script:

[oracle@asm ~]$ rman target /

Recovery Manager: Release 19.0.0.0.0 – Production on Fri Jan 21 08:01:54 2022
Version 19.3.0.0.0

Copyright (c) 1982, 2019, Oracle and/or its affiliates. All rights reserved.

connected to target database: ORAASM (DBID=1977555372)

RMAN> @backup.rcv

RMAN> run {
2> allocate channel t1 type disk;
3> allocate channel t2 type disk;
4> allocate channel t3 type disk;
5> backup incremental level 0 database format ‘/u01/share/backup/database_%d_%u_%s’;
6> release channel t1;
7> release channel t2;
8> release channel t3;
9> }
using target database control file instead of recovery catalog
allocated channel: t1
channel t1: SID=78 device type=DISK

allocated channel: t2
channel t2: SID=89 device type=DISK

allocated channel: t3
channel t3: SID=88 device type=DISK

Starting backup at 21-JAN-22
channel t1: starting incremental level 0 datafile backup set
channel t1: specifying datafile(s) in backup set
input datafile file number=00001 name=+DATA/ORAASM/DATAFILE/system.257.1092813819
channel t1: starting piece 1 at 21-JAN-22
channel t2: starting incremental level 0 datafile backup set
channel t2: specifying datafile(s) in backup set
input datafile file number=00003 name=+DATA/ORAASM/DATAFILE/sysaux.258.1092813853
input datafile file number=00014 name=+DATA/ORAASM/DATAFILE/tblspace.281.1093044531
input datafile file number=00007 name=+DATA/ORAASM/DATAFILE/users.260.1092813869
channel t2: starting piece 1 at 21-JAN-22
channel t3: starting incremental level 0 datafile backup set
channel t3: specifying datafile(s) in backup set
input datafile file number=00004 name=+DATA/ORAASM/DATAFILE/undotbs1.259.1092813869
input datafile file number=00015 name=+DATA/ORAASM/DATAFILE/test.282.1094538795
input datafile file number=00013 name=+DATA/ORAASM/DATAFILE/tblspace.280.1093044407
channel t3: starting piece 1 at 21-JAN-22
channel t3: finished piece 1 at 21-JAN-22
piece handle=/u01/share/backup/database_ORAASM_080jqqo1_8 tag=TAG20220121T080204 comment=NONE
channel t3: backup set complete, elapsed time: 00:00:16
channel t3: starting incremental level 0 datafile backup set
channel t3: specifying datafile(s) in backup set
input datafile file number=00010 name=+DATA/ORAASM/D47CEAB72C2F2513E053867EA8C0538D/DATAFILE/sysaux.277.1092815375
input datafile file number=00011 name=+DATA/ORAASM/D47CEAB72C2F2513E053867EA8C0538D/DATAFILE/undotbs1.275.1092815375
channel t3: starting piece 1 at 21-JAN-22
channel t1: finished piece 1 at 21-JAN-22
piece handle=/u01/share/backup/database_ORAASM_060jqqns_6 tag=TAG20220121T080204 comment=NONE
channel t1: backup set complete, elapsed time: 00:01:10
channel t1: starting incremental level 0 datafile backup set
channel t1: specifying datafile(s) in backup set
input datafile file number=00006 name=+DATA/ORAASM/86B637B62FE07A65E053F706E80A27CA/DATAFILE/sysaux.271.1092814421
channel t1: starting piece 1 at 21-JAN-22
channel t2: finished piece 1 at 21-JAN-22
piece handle=/u01/share/backup/database_ORAASM_070jqqns_7 tag=TAG20220121T080204 comment=NONE
channel t2: backup set complete, elapsed time: 00:01:13
channel t2: starting incremental level 0 datafile backup set
channel t2: specifying datafile(s) in backup set
input datafile file number=00009 name=+DATA/ORAASM/D47CEAB72C2F2513E053867EA8C0538D/DATAFILE/system.276.1092815375
input datafile file number=00012 name=+DATA/ORAASM/D47CEAB72C2F2513E053867EA8C0538D/DATAFILE/users.279.1092815459
channel t2: starting piece 1 at 21-JAN-22
channel t3: finished piece 1 at 21-JAN-22
piece handle=/u01/share/backup/database_ORAASM_090jqqop_9 tag=TAG20220121T080204 comment=NONE
channel t3: backup set complete, elapsed time: 00:00:49
channel t3: starting incremental level 0 datafile backup set
channel t3: specifying datafile(s) in backup set
input datafile file number=00005 name=+DATA/ORAASM/86B637B62FE07A65E053F706E80A27CA/DATAFILE/system.270.1092814419
channel t3: starting piece 1 at 21-JAN-22
channel t1: finished piece 1 at 21-JAN-22
piece handle=/u01/share/backup/database_ORAASM_0a0jqqq2_10 tag=TAG20220121T080204 comment=NONE
channel t1: backup set complete, elapsed time: 00:00:12
channel t1: starting incremental level 0 datafile backup set
channel t1: specifying datafile(s) in backup set
input datafile file number=00008 name=+DATA/ORAASM/86B637B62FE07A65E053F706E80A27CA/DATAFILE/undotbs1.272.1092814421
channel t1: starting piece 1 at 21-JAN-22
channel t1: finished piece 1 at 21-JAN-22
piece handle=/u01/share/backup/database_ORAASM_0d0jqqqg_13 tag=TAG20220121T080204 comment=NONE
channel t1: backup set complete, elapsed time: 00:00:26
channel t2: finished piece 1 at 21-JAN-22
piece handle=/u01/share/backup/database_ORAASM_0b0jqqq9_11 tag=TAG20220121T080204 comment=NONE
channel t2: backup set complete, elapsed time: 00:00:27
channel t3: finished piece 1 at 21-JAN-22
piece handle=/u01/share/backup/database_ORAASM_0c0jqqqf_12 tag=TAG20220121T080204 comment=NONE
channel t3: backup set complete, elapsed time: 00:00:26
Finished backup at 21-JAN-22

Starting Control File and SPFILE Autobackup at 21-JAN-22
piece handle=+DATA/ORAASM/AUTOBACKUP/2022_01_21/s_1094544235.283.1094544237 comment=NONE
Finished Control File and SPFILE Autobackup at 21-JAN-22

released channel: t1

released channel: t2

released channel: t3

RMAN> sql ‘alter system archive log current’;
sql statement: alter system archive log current

RMAN> run {
2> allocate channel a1 type disk;
3> backup archivelog all format ‘/u01/share/backup/arch_%d_%u_%s’;
4> release channel a1;
5> }
allocated channel: a1
channel a1: SID=78 device type=DISK

Starting backup at 21-JAN-22
current log archived
channel a1: starting archived log backup set
channel a1: specifying archived log(s) in backup set
input archived log thread=1 sequence=16 RECID=1 STAMP=1094544242
input archived log thread=1 sequence=17 RECID=2 STAMP=1094544243
channel a1: starting piece 1 at 21-JAN-22
channel a1: finished piece 1 at 21-JAN-22
piece handle=/u01/share/backup/arch_ORAASM_0f0jqqrk_15 tag=TAG20220121T080403 comment=NONE
channel a1: backup set complete, elapsed time: 00:00:03
Finished backup at 21-JAN-22

Starting Control File and SPFILE Autobackup at 21-JAN-22
piece handle=+DATA/ORAASM/AUTOBACKUP/2022_01_21/s_1094544247.289.1094544249 comment=NONE
Finished Control File and SPFILE Autobackup at 21-JAN-22

released channel: a1

RMAN> run {
2> allocate channel c1 type disk;
3> backup current controlfile format ‘/u01/share/backup/Control_%d_%u_%s’;
4> release channel c1;
5> }
allocated channel: c1
channel c1: SID=78 device type=DISK

Starting backup at 21-JAN-22
channel c1: starting full datafile backup set
channel c1: specifying datafile(s) in backup set
including current control file in backup set
channel c1: starting piece 1 at 21-JAN-22
channel c1: finished piece 1 at 21-JAN-22
piece handle=/u01/share/backup/Control_ORAASM_0h0jqqrs_17 tag=TAG20220121T080412 comment=NONE
channel c1: backup set complete, elapsed time: 00:00:01
Finished backup at 21-JAN-22

Starting Control File and SPFILE Autobackup at 21-JAN-22
piece handle=+DATA/ORAASM/AUTOBACKUP/2022_01_21/s_1094544256.290.1094544257 comment=NONE
Finished Control File and SPFILE Autobackup at 21-JAN-22

released channel: c1

RMAN> exit

Recovery Manager complete.

Check the backup file location:

Step 2: Create pfile from spfile

create pfile=’/home/oracle/initasmora.ora’ from spfile;
Step 3: Copy the backup file into destination server

[oracle@asm backup]$ scp * [email protected]:/u01/backup/

Destination server:

Step 1: Edit pfile
Change DB_UNIQUE_NAME in the pfile:

*.audit_file_dest=’/u01/app/oracle/admin/oraasm/adump’
*.audit_trail=’db’
*.compatible=’19.0.0′
*.control_files=’+DATA/ASMORA/CONTROLFILE/current.262.1092813933′,’+DATA/ASMORA/CONTROLFILE/current.261.1092813933′
*.db_block_size=8192
*.db_create_file_dest=’+DATA’
*.db_name=’oraasm’
*.db_recovery_file_dest=’+DATA’
*.db_recovery_file_dest_size=12732m
*.db_unique_name=’asmora’                —–>change db unique name
*.diagnostic_dest=’/u01/app/oracle’
*.dispatchers='(PROTOCOL=TCP) (SERVICE=oraasmXDB)’
*.enable_pluggable_database=true
*.local_listener=’LISTENER_ORAASM’
*.open_cursors=300
*.pga_aggregate_target=629m
*.processes=300
*.remote_login_passwordfile=’EXCLUSIVE’
*.sga_target=1886m
*.undo_tablespace=’UNDOTBS1′
[oracle@asm dbs]$

Step 2: Create Required Folders

Create required folders in the destination server
[oracle@asmnew ~]$ mkdir -p /u01/app/oracle/admin/ASMORA/adump/

Step 3: Add the Database entry in oratab file.

ASMORA:/u01/app/oracle/product/19.0.0/dbhome_1:N

Step 4: startup database using pfile nomount stage

[oracle@asmnew asmora]$ export ORACLE_SID=asmora
[oracle@asmnew asmora]$ sqlplus / as sysdba

SQL*Plus: Release 19.0.0.0.0 – Production on Fri Jan 21 08:18:06 2022
Version 19.3.0.0.0

Copyright (c) 1982, 2019, Oracle. All rights reserved.

Connected to an idle instance.

SQL> startup nomount pfile=’/u01/asmora/initasmora.ora’;
ORACLE instance started.

Total System Global Area 1979709696 bytes
Fixed Size 9136384 bytes
Variable Size 452984832 bytes
Database Buffers 1509949440 bytes
Redo Buffers 7639040 bytes

Step 5: restore control file from backup location

[oracle@asmnew asmora]$ rman target /

Recovery Manager: Release 19.0.0.0.0 – Production on Fri Jan 21 08:22:04 2022
Version 19.3.0.0.0

Copyright (c) 1982, 2019, Oracle and/or its affiliates. All rights reserved.

connected to target database: ORAASM (not mounted)

RMAN> restore controlfile from ‘/u01/share/backup/Control_ORAASM_0h0jqqrs_17’;

Starting restore at 21-JAN-22
using target database control file instead of recovery catalog
allocated channel: ORA_DISK_1
channel ORA_DISK_1: SID=44 device type=DISK

channel ORA_DISK_1: restoring control file
channel ORA_DISK_1: restore complete, elapsed time: 00:00:05
output file name=+DATA/ORAASM/CONTROLFILE/current.262.1092813933
output file name=+DATA/ORAASM/CONTROLFILE/current.261.1092813933
Finished restore at 21-JAN-22

RMAN>

Step 6: Mount the database.

SQL> alter database mount;

Database altered.

SQL> select name, open_mode, db_unique_name from v$database;

NAME OPEN_MODE DB_UNIQUE_NAME


ORAASM MOUNTED asmora

Step 7: Catalog backup files

CATALOG BACKUPPIECE ‘/u01/asmora/arch_ORAASM_0f0jqqrk_15’;
CATALOG BACKUPPIECE ‘/u01/asmora/Control_ORAASM_0h0jqqrs_17’;
CATALOG BACKUPPIECE ‘/u01/asmora/database_ORAASM_030jqo9c_3’;
CATALOG BACKUPPIECE ‘/u01/asmora/database_ORAASM_060jqqns_6’;
CATALOG BACKUPPIECE ‘/u01/asmora/database_ORAASM_070jqqns_7’;
CATALOG BACKUPPIECE ‘/u01/asmora/database_ORAASM_080jqqo1_8’;
CATALOG BACKUPPIECE ‘/u01/asmora/database_ORAASM_090jqqop_9’;
CATALOG BACKUPPIECE ‘/u01/asmora/database_ORAASM_0a0jqqq2_10’;
CATALOG BACKUPPIECE ‘/u01/asmora/database_ORAASM_0b0jqqq9_11’;
CATALOG BACKUPPIECE ‘/u01/asmora/database_ORAASM_0c0jqqqf_12’;
CATALOG BACKUPPIECE ‘/u01/asmora/database_ORAASM_0d0jqqqg_13’;

Step 8: Restore and recover database

List backup archivelogs

RMAN> list backup of archivelog all;

recover database using rman

run
{
ALLOCATE CHANNEL d1 DEVICE TYPE disk;
ALLOCATE CHANNEL d2 DEVICE TYPE disk;
set newname for datafile 1 to ‘+DATA’;
set newname for datafile 2 to ‘+DATA’;
set newname for datafile 3 to ‘+DATA’;
set newname for datafile 4 to ‘+DATA’;
set newname for datafile 5 to ‘+DATA’;
SQL “ALTER DATABASE RENAME FILE ”+DATA/oraasm/onlinelog/group_3.268.1092813965”
to ”+DATA”” ;
SQL “ALTER DATABASE RENAME FILE ”+DATA/oraasm/onlinelog/group_2.266.1092813951”
to ”+DATA”” ;
SQL “ALTER DATABASE RENAME FILE ”+DATA/oraasm/onlinelog/group_1.265.1092813949”
to ”+DATA”” ;
SET UNTIL SEQUENCE 12; <— 11+1
RESTORE DATABASE;
SWITCH DATAFILE ALL;
RECOVER DATABASE;
}

check logfile and database role

Step 9:change database name and ID

modify pfile
SQL> shut immediate;
Database closed.
Database dismounted.
ORACLE instance shut down.
SQL>

add this controlfile entry to pfile

SQL> startup nomount pfile='initasmora.ora';
ORACLE instance started.

Total System Global Area 1269366784 bytes
Fixed Size                  2227984 bytes
Variable Size             838861040 bytes
Database Buffers          419430400 bytes
Redo Buffers                8847360 bytes
SQL> alter database mount;

Database altered.

SQL>

set db name and id:

[oracle@asm asmora]$ . oraenv
ORACLE_SID = [asmora] ?
The Oracle base remains unchanged with value /u01/app/oracle
[oracle@asm asmora]$ nid target=sys dbname=asmora

DBNEWID: Release 19.0.0.0.0 – Production on Fri Jan 21 09:09:50 2022

Copyright (c) 1982, 2019, Oracle and/or its affiliates. All rights reserved.

Password:
Connected to database ORAASM (DBID=1977555372)

Connected to server version 19.3.0

Control Files in database:
+DATA/ASMORA/CONTROLFILE/current.262.1092813933
+DATA/ASMORA/CONTROLFILE/current.261.1092813933

Change database ID and database name ORAASM to ASMORA? (Y/[N]) => y

Proceeding with operation
Changing database ID from 1977555372 to 65466533
Changing database name from ORAASM to ASMORA
Control File +DATA/ASMORA/CONTROLFILE/current.262.1092813933 – modified
Control File +DATA/ASMORA/CONTROLFILE/current.261.1092813933 – modified
Datafile +DATA/ORAASM/DATAFILE/system.257.109281381 – dbid changed, wrote new name
Datafile +DATA/ORAASM/DATAFILE/sysaux.258.109281385 – dbid changed, wrote new name
Datafile +DATA/ORAASM/DATAFILE/undotbs1.259.109281386 – dbid changed, wrote new name
Datafile +DATA/ORAASM/86B637B62FE07A65E053F706E80A27CA/DATAFILE/system.270.109281441 – dbid changed, wrote new name
Datafile +DATA/ORAASM/86B637B62FE07A65E053F706E80A27CA/DATAFILE/sysaux.271.109281442 – dbid changed, wrote new name
Datafile +DATA/ORAASM/DATAFILE/users.260.109281386 – dbid changed, wrote new name
Datafile +DATA/ORAASM/86B637B62FE07A65E053F706E80A27CA/DATAFILE/undotbs1.272.109281442 – dbid changed, wrote new name
Datafile +DATA/ORAASM/D47CEAB72C2F2513E053867EA8C0538D/DATAFILE/system.276.109281537 – dbid changed, wrote new name
Datafile +DATA/ORAASM/D47CEAB72C2F2513E053867EA8C0538D/DATAFILE/sysaux.277.109281537 – dbid changed, wrote new name
Datafile +DATA/ORAASM/D47CEAB72C2F2513E053867EA8C0538D/DATAFILE/undotbs1.275.109281537 – dbid changed, wrote new name
Datafile +DATA/ORAASM/D47CEAB72C2F2513E053867EA8C0538D/DATAFILE/users.279.109281545 – dbid changed, wrote new name
Datafile +DATA/ORAASM/DATAFILE/tblspace.280.109304440 – dbid changed, wrote new name
Datafile +DATA/ORAASM/DATAFILE/tblspace.281.109304453 – dbid changed, wrote new name
Datafile +DATA/ORAASM/DATAFILE/test.282.109453879 – dbid changed, wrote new name
Datafile +DATA/ORAASM/TEMPFILE/temp.269.109281404 – dbid changed, wrote new name
Datafile +DATA/ORAASM/D47CB418C2B91B66E053867EA8C0C5A0/TEMPFILE/temp.273.109281445 – dbid changed, wrote new name
Datafile +DATA/ORAASM/D47CEAB72C2F2513E053867EA8C0538D/TEMPFILE/temp.278.109281541 – dbid changed, wrote new name
Control File +DATA/ASMORA/CONTROLFILE/current.262.1092813933 – dbid changed, wrote new name
Control File +DATA/ASMORA/CONTROLFILE/current.261.1092813933 – dbid changed, wrote new name
Instance shut down

Database name changed to ASMORA.
Modify parameter file and generate a new password file before restarting.
Database ID for database ASMORA changed to 65466533.
All previous backups and archived redo logs for this database are unusable.
Database is not aware of previous backups and archived logs in Recovery Area.
Database has been shutdown, open database with RESETLOGS option.
Succesfully changed database name and ID.
DBNEWID – Completed succesfully.

[oracle@asm asmora]$

Step 10: check the DB name and id

SQL> alter database open resetlogs;

Database altered.

SQL> select name, open_mode, db_unique_name, dbid from v$database;

NAME OPEN_MODE DB_UNIQUE_NAME DBID


ASMORA READ WRITE asmora 65466533


Thank you for giving your valuable time to read the above information.

If you want to be updated with all our articles send us the Invitation or Follow us:

Ramkumar’s LinkedIn: https://www.linkedin.com/in/ramkumardba/
LinkedIn Group: https://www.linkedin.com/in/ramkumar-m-0061a0204/
Facebook Page: https://www.facebook.com/Oracleagent-344577549964301
Ramkumar’s Twitter: https://twitter.com/ramkuma02877110
Ramkumar’s Telegram: https://t.me/oracleageant
Ramkumar’s Facebook: https://www.facebook.com/ramkumarram8

ASM TOOLS and Configuration Basic Commands.

1. check the asm process running:

[oracle@asm ~]$ ps -ef|grep smon
oracle 8648 23558 0 16:52 pts/0 00:00:00 grep –color=auto smon
oracle 9349 1 0 09:50 ? 00:00:00 ora_smon_oraasm
oracle 30582 1 0 Jan01 ? 00:00:02 asm_smon_+ASM
[oracle@asm ~]$ ps -ef|grep d.bin
oracle 10968 23558 0 16:54 pts/0 00:00:00 grep –color=auto d.bin
oracle 26445 1 0 Jan01 ? 00:09:46 /u01/app/grid/bin/ohasd.bin reboot
oracle 26662 1 0 Jan01 ? 00:12:17 /u01/app/grid/bin/oraagent.bin
oracle 26733 1 0 Jan01 ? 00:04:50 /u01/app/grid/bin/evmd.bin
oracle 26796 26733 0 Jan01 ? 00:04:47 /u01/app/grid/bin/evmlogger.bin -o /u01/app/grid/log/[HOSTNAME]/evmd/evmlogger.info -l /u01/app/grid/log/[HOSTNAME]/evmd/evmlogger.log
oracle 27085 1 0 Jan01 ? 00:00:02 /u01/app/grid/bin/tnslsnr LISTENER -no_crs_notify -inherit
oracle 30264 1 0 Jan01 ? 00:05:25 /u01/app/grid/bin/cssdagent
oracle 30302 1 0 Jan01 ? 00:05:13 /u01/app/grid/bin/ocssd.bin
[oracle@asm ~]$ hostname
asm.localdomain
[oracle@asm ~]$ uname -r
3.10.0-957.el7.x86_64

2. check cluster resource status:

[oracle@asm ~]$ export PATH=$GRID_HOME/bin:$PATH
[oracle@asm ~]$ crsctl stat res -t
——————————————————————————–
Name Target State Server State details
——————————————————————————–
Local Resources
——————————————————————————–
ora.DATA.dg
ONLINE ONLINE asm STABLE
ora.LISTENER.lsnr
ONLINE ONLINE asm STABLE
ora.asm
ONLINE ONLINE asm Started,STABLE
ora.ons
OFFLINE OFFLINE asm STABLE
——————————————————————————–
Cluster Resources
——————————————————————————–
ora.cssd
1 ONLINE ONLINE asm STABLE
ora.diskmon
1 OFFLINE OFFLINE STABLE
ora.evmd
1 ONLINE ONLINE asm STABLE
ora.oraasm.db
1 ONLINE ONLINE asm Open,HOME=/u01/app/o
racle/product/19.0.0
/dbhome_1,STABLE
——————————————————————————–

3. check database running status and start stop database:

[oracle@asm ~]$ srvctl status database -d oraasm
Database is running.
[oracle@asm ~]$

srvctl stop database -d oraasm
srvctl start database -d oraasm

4. check oracle home in grid:

[oracle@asm ~]$ . grid.env
[oracle@asm ~]$ env |grep ORA
ORACLE_SID=+ASM
ORACLE_BASE=/u01/app/oracle
ORACLE_HOSTNAME=asm.localdomain
ORACLE_TERM=xterm
ORACLE_HOME=/u01/app/grid
[oracle@asm ~]$

5. check oracle home in database:

[oracle@asm ~]$ . db.env
[oracle@asm ~]$ env |grep ORA
ORACLE_SID=oraasm
ORACLE_BASE=/u01/app/oracle
ORACLE_HOSTNAME=asm.localdomain
ORACLE_TERM=xterm
ORACLE_HOME=/u01/app/oracle/product/19.3.0/dbhome_1
[oracle@asm ~]$

6. List the disks:

[root@asm ~]# cd /dev/
[root@asm dev]# ll sd*
brw-rw—-. 1 root disk 8, 0 Dec 31 10:45 sda
brw-rw—-. 1 root disk 8, 1 Dec 31 10:45 sda1
brw-rw—-. 1 root disk 8, 2 Dec 31 10:45 sda2
brw-rw—-. 1 root disk 8, 3 Dec 31 10:45 sda3
brw-rw—-. 1 root disk 8, 4 Dec 31 10:45 sda4
brw-rw—-. 1 root disk 8, 5 Dec 31 10:45 sda5
brw-rw—-. 1 root disk 8, 16 Dec 31 11:57 sdb
brw-rw—-. 1 root disk 8, 17 Dec 31 12:00 sdb1
brw-rw—-. 1 root disk 8, 32 Dec 31 11:58 sdc
brw-rw—-. 1 root disk 8, 33 Dec 31 12:00 sdc1

ASM TOOLS:
INSTALLATION TOOLS -oracleasm
ADMINSTRATION – asmcmd
DEBUGGING – kfod kfed ocrcheck

7. scan and list the disk using oracleasm:
[root@asm dev]# oracleasm scandisks
Reloading disk partitions: done
Cleaning any stale ASM disks…
Scanning system for ASM disks…
[root@asm dev]# oracleasm listdisks
DISK1
DISK2
[root@asm dev]#

8. asmcmd tool:

[oracle@asm ~]$ asmcmd
ASMCMD>
ASMCMD>

I. list the disk group
ASMCMD> lsdg
State Type Rebal Sector Logical_Sector Block AU Total_MB Free_MB Req_mir_free_MB Usable_file_MB Offline_disks Voting_files Name
MOUNTED EXTERN N 512 512 4096 4194304 30712 25860 0 25860 0 N DATA/
ASMCMD>

II. list datafile,controlfile

ASMCMD> cd DATA/
ASMCMD> ls
ASM/
ORAASM/
orapwasm
ASMCMD> cd ORAASM
ASMCMD> ls
86B637B62FE07A65E053F706E80A27CA/
CONTROLFILE/
D47CB418C2B91B66E053867EA8C0C5A0/
D47CEAB72C2F2513E053867EA8C0538D/
DATAFILE/
ONLINELOG/
PARAMETERFILE/
TEMPFILE/
ASMCMD> cd DATAFILE
ASMCMD> ls
SYSAUX.258.1092813853
SYSTEM.257.1092813819
UNDOTBS1.259.1092813869
USERS.260.1092813869
ASMCMD> pwd
+DATA/ORAASM/DATAFILE
ASMCMD>

9. check css,has status:

[oracle@asm ~]$ crsctl check has
CRS-4638: Oracle High Availability Services is online
[oracle@asm ~]$ crsctl check css
CRS-4529: Cluster Synchronization Services is online
[oracle@asm ~]$

10. check has version:

[oracle@asm ~]$ crsctl query has releaseversion
Oracle High Availability Services release version on the local node is [19.0.0.0.0]
[oracle@asm ~]$ crsctl query has softwareversion
Oracle High Availability Services version on the local node is [19.0.0.0.0]
[oracle@asm ~]$

11. asmca —> GUI for create and manage diskgroup:

12. KFOD – discovering disks with the help of asm disk strings:
KFED – discovering disk headers

[oracle@asm ~]$ cd $ORACLE_HOME/bin
[oracle@asm bin]$ pwd
/u01/app/grid/bin
[oracle@asm bin]$ ll kfod
-rwxrwxr-x. 1 oracle oinstall 11453 Dec 31 12:22 kfod
[oracle@asm bin]$ ll kfed
-rwxrwxr-x. 1 oracle oinstall 142432 Dec 31 12:20 kfed

[oracle@asm bin]$ kfod status=TRUE disks=ALL
——————————————————————————–
Disk Size Header Path User Group
================================================================================
1: 20479 MB MEMBER /dev/oracleasm/disks/DISK1 oracle oinstall
2: 10239 MB MEMBER /dev/oracleasm/disks/DISK2 oracle oinstall
——————————————————————————–
ORACLE_SID ORACLE_HOME
================================================================================
+ASM /u01/app/grid
[oracle@asm bin]$

[oracle@asm bin]$ kfed read /dev/oracleasm/disks/DISK1 | egrep ‘name|size|type’
kfbh.type: 1 ; 0x002: KFBTYP_DISKHEAD
kfdhdb.dskname: DATA_0000 ; 0x028: length=9
kfdhdb.grpname: DATA ; 0x048: length=4
kfdhdb.fgname: DATA_0000 ; 0x068: length=9
kfdhdb.secsize: 512 ; 0x0b8: 0x0200
kfdhdb.blksize: 4096 ; 0x0ba: 0x1000
kfdhdb.ausize: 4194304 ; 0x0bc: 0x00400000
kfdhdb.dsksize: 5119 ; 0x0c4: 0x000013ff
[oracle@asm bin]$

13. check olr and ocr location :
[oracle@asm ~]$ ocrcheck
Status of Oracle Cluster Registry is as follows :
Version : 4
Total space (kbytes) : 491684
Used space (kbytes) : 82368
Available space (kbytes) : 409316
ID : 786336035
Device/File Name : /u01/app/grid/cdata/localhost/local.ocr
Device/File integrity check succeeded

Device/File not configured

Device/File not configured

Device/File not configured

Device/File not configured

Cluster registry integrity check succeeded

Logical corruption check bypassed due to non-privileged user

[oracle@asm ~]$
[oracle@asm ~]$ ocrcheck -local
Status of Oracle Local Registry is as follows :
Version : 4
Total space (kbytes) : 491684
Used space (kbytes) : 83496
Available space (kbytes) : 408188
ID : 476403298
Device/File Name : /u01/app/oracle/crsdata/asm/olr/asm_19.olr
Device/File integrity check succeeded

Local registry integrity check succeeded

Logical corruption check bypassed due to non-privileged user

[oracle@asm ~]$ ocrcheck -local -config
Oracle Local Registry configuration is :
Device/File Name : /u01/app/oracle/crsdata/asm/olr/asm_19.olr
[oracle@asm ~]$

14. Check the asm status in sysasm admin:

[oracle@asm ~]$ sqlplus / as sysasm

SQL*Plus: Release 19.0.0.0.0 – Production on Sun Jan 2 17:57:52 2022
Version 19.3.0.0.0

Copyright (c) 1982, 2019, Oracle. All rights reserved.

Connected to:
Oracle Database 19c Enterprise Edition Release 19.0.0.0.0 – Production
Version 19.3.0.0.0

15. check instance type:

SQL> show parameter INSTANCE_TYPE

NAME TYPE VALUE
———————————— ———– ——————————
instance_type string ASM

16. spfile location:

SQL> show parameter spfile

NAME TYPE VALUE
———————————— ———– ——————————
spfile string +DATA/ASM/ASMPARAMETERFILE/reg
istry.253.1092745689

17. pfile creation:
SQL> create pfile from spfile;

File created.

SQL> exit
Disconnected from Oracle Database 19c Enterprise Edition Release 19.0.0.0.0 – Production
Version 19.3.0.0.0
[oracle@asm ~]$ cd $ORACLE_HOME/dbs
[oracle@asm dbs]$ ls
ab_+ASM.dat hc_+ASM.dat init+ASM.ora init.ora
[oracle@asm dbs]$ cat init+ASM.ora
+ASM.__oracle_base=’/u01/app/oracle’#ORACLE_BASE set from in memory value
.asm_diskstring=’/dev/oracleasm/disks’
.asm_power_limit=1
.large_pool_size=12M
.remote_login_passwordfile=’EXCLUSIVE’
[oracle@asm dbs]$ sqlplus / as sysasm

SQL*Plus: Release 19.0.0.0.0 – Production on Sun Jan 2 18:01:05 2022
Version 19.3.0.0.0

Copyright (c) 1982, 2019, Oracle. All rights reserved.

Connected to:
Oracle Database 19c Enterprise Edition Release 19.0.0.0.0 – Production
Version 19.3.0.0.0

18. instance type and status:

SQL> select instance_name,status from v$instance;

INSTANCE_NAME STATUS
—————- ————
+ASM STARTED

SQL> exit
Disconnected from Oracle Database 19c Enterprise Edition Release 19.0.0.0.0 – Production
Version 19.3.0.0.0
[oracle@asm dbs]$ crsctl stat res -t
——————————————————————————–
Name Target State Server State details
——————————————————————————–
Local Resources
——————————————————————————–
ora.DATA.dg
ONLINE ONLINE asm STABLE
ora.LISTENER.lsnr
ONLINE ONLINE asm STABLE
ora.asm
ONLINE ONLINE asm Started,STABLE
ora.ons
OFFLINE OFFLINE asm STABLE
——————————————————————————–
Cluster Resources
——————————————————————————–
ora.cssd
1 ONLINE ONLINE asm STABLE
ora.diskmon
1 OFFLINE OFFLINE STABLE
ora.evmd
1 ONLINE ONLINE asm STABLE
ora.oraasm.db
1 ONLINE ONLINE asm Open,HOME=/u01/app/o
racle/product/19.0.0
/dbhome_1,STABLE
——————————————————————————–
[oracle@asm dbs]$

19. ASMCMD check datafile and controlfile:

[oracle@asm dbs]$ asmcmd
ASMCMD>
ASMCMD>
ASMCMD>
ASMCMD> lsdg
State Type Rebal Sector Logical_Sector Block AU Total_MB Free_MB Req_mir_free_MB Usable_file_MB Offline_disks Voting_files Name
MOUNTED EXTERN N 512 512 4096 4194304 30712 25852 0 25852 0 N DATA/
ASMCMD> cd +DATA/oraasm/datafile
ASMCMD> ls
SYSAUX.258.1092813853
SYSTEM.257.1092813819
UNDOTBS1.259.1092813869
USERS.260.1092813869
ASMCMD> ls -l
Type Redund Striped Time Sys Name
DATAFILE UNPROT COARSE JAN 02 17:00:00 Y SYSAUX.258.1092813853
DATAFILE UNPROT COARSE JAN 02 17:00:00 Y SYSTEM.257.1092813819
DATAFILE UNPROT COARSE JAN 02 17:00:00 Y UNDOTBS1.259.1092813869
DATAFILE UNPROT COARSE JAN 02 17:00:00 Y USERS.260.1092813869
ASMCMD>

ASMCMD> cd +DATA/oraasm/parameterfile

ASMCMD> ls -l
Type Redund Striped Time Sys Name
PARAMETERFILE UNPROT COARSE JAN 02 17:00:00 Y spfile.274.1092815069
ASMCMD>

ASMCMD> ls -l
Type Redund Striped Time Sys Name
ASMPARAMETERFILE UNPROT COARSE DEC 31 12:00:00 Y REGISTRY.253.1092745689
ASMCMD> pwd
+DATA/ASM/ASMPARAMETERFILE
ASMCMD>

20. query to check asm_disk and asm disk_group:

SQL> select disk_number,name,path,header_status,mode_status,state,total_mb,free_mb from v$asm_disk;

DISK_NUMBER NAME PATH HEADER_STATU MODE_ST STATE TOTAL_MB FREE_MB
—————————————————————————————————-
0 DATA_0000 /dev/oracleasm/disks/DISK1 MEMBER ONLINE NORMAL 20476 17228

1 DATA_0001 /dev/oracleasm/disks/DISK2 MEMBER ONLINE NORMAL 10236 8624


SQL> select group_number,name,state,type from v$asm_diskgroup;

GROUP_NUMBER NAME STATE TYPE
———— —————————— ———– ——
1 DATA MOUNTED EXTERN

SQL>


Thank you for giving your valuable time to read the above information.

If you want to be updated with all our articles send us the Invitation or Follow us:

Ramkumar’s LinkedIn: https://www.linkedin.com/in/ramkumardba/
LinkedIn Group: https://www.linkedin.com/in/ramkumar-m-0061a0204/
Facebook Page: https://www.facebook.com/Oracleagent-344577549964301
Ramkumar’s Twitter: https://twitter.com/ramkuma02877110
Ramkumar’s Telegram: https://t.me/oracleageant
Ramkumar’s Facebook: https://www.facebook.com/ramkumarram8

Adding NEW disk group in ASM

Description:
          In this blog, we are going to see step by step process for adding a disk in ASM disk group.

Rebalance ASM Disks:
          Oracle ASM automatically rebalances disk groups when their configuration changes. You might want to do a manual rebalance operation to control the speed of what would otherwise be an automatic rebalance operation.

Pre request-
Add needed disk space in virtual machine.

Steps:-

1. Login as root user source the bash profile:

[oracle@asm ~]$ . .bash_profile
[oracle@asm ~]$ su root
Password:
[root@asm oracle]#
[root@asm oracle]# cd

2. New disk configuration:

[root@asm ~]# fdisk /dev/sdd
Welcome to fdisk (util-linux 2.23.2).

Changes will remain in memory only until you decide to write them.
Be careful before using the write command.

The device does not contain a recognized partition table
Building a new DOS disklabel with disk identifier 0xf8f5f5c6.

Command (m for help): m
Command action
a toggle a bootable flag
b edit bsd disklabel
c toggle the dos compatibility flag
d delete a partition
g create a new empty GPT partition table
G create an IRIX (SGI) partition table
l list known partition types
m print this menu
n add a new partition
o create a new empty DOS partition table
p print the partition table
q quit without saving changes
s create a new empty Sun disklabel
t change a partition’s system id
u change display/entry units
v verify the partition table
w write table to disk and exit
x extra functionality (experts only)

Command (m for help): n
Partition type:
p primary (0 primary, 0 extended, 4 free)
e extended
Select (default p):
Using default response p
Partition number (1-4, default 1):
First sector (2048-10485759, default 2048):
Using default value 2048
Last sector, +sectors or +size{K,M,G} (2048-10485759, default 10485759):
Using default value 10485759
Partition 1 of type Linux and of size 5 GiB is set

Command (m for help): w
The partition table has been altered!

Calling ioctl() to re-read partition table.
Syncing disks.

3. List the disks:

[root@asm ~]# fdisk -l

Disk /dev/sda: 107.4 GB, 107374182400 bytes, 209715200 sectors
Units = sectors of 1 * 512 = 512 bytes
Sector size (logical/physical): 512 bytes / 512 bytes
I/O size (minimum/optimal): 512 bytes / 512 bytes
Disk label type: dos
Disk identifier: 0x0001d229

Device Boot Start End Blocks Id System
/dev/sda1 * 2048 14338047 7168000 83 Linux
/dev/sda2 14338048 98306047 41984000 83 Linux
/dev/sda3 98306048 182274047 41984000 83 Linux
/dev/sda4 182274048 209715199 13720576 5 Extended
/dev/sda5 182276096 196612095 7168000 82 Linux swap / Solaris

Disk /dev/sdb: 21.5 GB, 21474836480 bytes, 41943040 sectors
Units = sectors of 1 * 512 = 512 bytes
Sector size (logical/physical): 512 bytes / 512 bytes
I/O size (minimum/optimal): 512 bytes / 512 bytes
Disk label type: dos
Disk identifier: 0xeba933f3

Device Boot Start End Blocks Id System
/dev/sdb1 2048 41943039 20970496 83 Linux

Disk /dev/sdc: 10.7 GB, 10737418240 bytes, 20971520 sectors
Units = sectors of 1 * 512 = 512 bytes
Sector size (logical/physical): 512 bytes / 512 bytes
I/O size (minimum/optimal): 512 bytes / 512 bytes
Disk label type: dos
Disk identifier: 0x330f95dd

Device Boot Start End Blocks Id System
/dev/sdc1 2048 20971519 10484736 83 Linux

Disk /dev/sdd: 5368 MB, 5368709120 bytes, 10485760 sectors
Units = sectors of 1 * 512 = 512 bytes
Sector size (logical/physical): 512 bytes / 512 bytes
I/O size (minimum/optimal): 512 bytes / 512 bytes
Disk label type: dos
Disk identifier: 0xf8f5f5c6

Device Boot Start End Blocks Id System
/dev/sdd1 2048 10485759 5241856 83 Linux

4. Configure oracle ASM:

[root@asm ~]# oracleasm configure -i
Configuring the Oracle ASM library driver.

This will configure the on-boot properties of the Oracle ASM library
driver. The following questions will determine whether the driver is
loaded on the boot and what permissions it will have. The current values
will be shown in brackets (‘[]’). Hitting <ENTER> without typing an
answer will keep that current value. Ctrl-C will abort.

Default user to own the driver interface [oracle]:
Default group to own the driver interface [oinstall]:
Start Oracle ASM library driver on boot (y/n) [y]:
Scan for Oracle ASM disks on boot (y/n) [y]:
Writing Oracle ASM library driver configuration: done
[root@asm ~]#

5. OS level disk creation:

[root@asm ~]# /usr/sbin/oracleasm init
[root@asm ~]# /usr/sbin/oracleasm createdisk DISK3 /dev/sdd1
Writing disk header: done
Instantiating disk: done
[root@asm ~]# cd /dev/oracleasm/disks/
[root@asm disks]#
[root@asm disks]#
[root@asm disks]#
[root@asm disks]#
[root@asm disks]# ls -lrt
total 0
brw-rw—-. 1 oracle oinstall 8, 49 Jan 6 06:15 DISK3
brw-rw—-. 1 oracle oinstall 8, 33 Jan 6 06:16 DISK2
brw-rw—-. 1 oracle oinstall 8, 17 Jan 6 06:16 DISK1
[root@asm disks]# oracleasm listdisks
DISK1
DISK2
DISK3
[root@asm disks]#
[root@asm disks]#
[root@asm disks]#
[root@asm disks]#

6. Create the disk using rebalance:

[oracle@asm ~]$ . .bash_profile
[oracle@asm ~]$ . grid.env
[oracle@asm ~]$ sqlplus / as sysasm

SQL*Plus: Release 19.0.0.0.0 – Production on Thu Jan 6 06:13:02 2022
Version 19.3.0.0.0

Copyright (c) 1982, 2019, Oracle. All rights reserved.

Connected to:
Oracle Database 19c Enterprise Edition Release 19.0.0.0.0 – Production
Version 19.3.0.0.0

7. Check the disk group status:
SQL> set lines 999;
col diskgroup for a15
col diskname for a15
col path for a35
select a.name DiskGroup,b.name DiskName, b.total_mb, (b.total_mb-b.free_mb) Used_MB, b.free_mb,b.path,b.header_status
from v$asm_disk b, v$asm_diskgroup a
where a.group_number (+) =b.group_number order by b.group_number,b.name;SQL> SQL> SQL> SQL> 2 3

DISKGROUP DISKNAME TOTAL_MB USED_MB FREE_MB PATH HEADER_STATU
————— ————— ———- ———- ———- ———————————– ————
0 0 0 /dev/oracleasm/disks/DISK3 PROVISIONED
DATA DATA_0000 20476 3380 17096 /dev/oracleasm/disks/DISK1 MEMBER
DATA DATA_0001 10236 1676 8560 /dev/oracleasm/disks/DISK2 MEMBER

8. Create a disk in asm using rebalance method:

SQL> alter diskgroup DATA add disk ‘/dev/oracleasm/disks/DISK3’ NAME DISK3 rebalance power 100;

Diskgroup altered.

9. Check the status of new disk group its shown as RUN:

SQL> col ERROR_CODE for a10
col PASS for a10
select * from v$asm_operation;SQL> SQL>

GROUP_NUMBER OPERA PASS STAT POWER ACTUAL SOFAR EST_WORK EST_RATE EST_MINUTES ERROR_CODE CON_ID
———— —– ———- —- ———- ———- ———- ———- ———- ———– ———- ———-
1 REBAL COMPACT WAIT 100 100 0 0 0 0 0
1 REBAL REBALANCE RUN 100 100 163 183 6515 0 0
1 REBAL REBUILD DONE 100 100 0 0 0 0 0

10. Check after some time it will show no rows selected so it can be created fine:

SQL> select * from v$asm_operation;
no rows selected

11. View the disk group:

SQL> set lines 999;
col diskgroup for a15
col diskname for a15
col path for a35
select a.name DiskGroup,b.name DiskName, b.total_mb, (b.total_mb-b.free_mb) Used_MB, b.free_mb,b.path,b.header_status
from v$asm_disk b, v$asm_diskgroup a
where a.group_number (+) =b.group_number order by b.group_number,b.name;SQL> SQL> SQL> SQL> 2 3

DISKGROUP DISKNAME TOTAL_MB USED_MB FREE_MB PATH HEADER_STATU
————— ————— ———- ———- ———- ———————————– ————
DATA DATA_0000 20476 2884 17592 /dev/oracleasm/disks/DISK1 MEMBER
DATA DATA_0001 10236 1456 8780 /dev/oracleasm/disks/DISK2 MEMBER
DATA DISK3 5116 728 4388 /dev/oracleasm/disks/DISK3 MEMBER


Thank you for giving your valuable time to read the above information.

If you want to be updated with all our articles send us the Invitation or Follow us:

Ramkumar’s LinkedIn: https://www.linkedin.com/in/ramkumardba/
LinkedIn Group: https://www.linkedin.com/in/ramkumar-m-0061a0204/
Facebook Page: https://www.facebook.com/Oracleagent-344577549964301
Ramkumar’s Twitter: https://twitter.com/ramkuma02877110
Ramkumar’s Telegram: https://t.me/oracleageant
Ramkumar’s Facebook: https://www.facebook.com/ramkumarram8


ASM File Handling Basics

ASM File Handling Basics

Description:
          In this blog we are going to see datafile,logfile,and archivelog create,resize delete in the ASM oracle database server.

Oracle ASM:

         Oracle ASM is a volume manager and a file system for Oracle database files that supports single-instance Oracle Database and Oracle Real Application Clusters (Oracle RAC) configurations. Oracle ASM is Oracle’s recommended storage management solution that provides an alternative to conventional volume managers, file systems, and raw devices.

ASM Disk Groups:

         Oracle ASM uses disk groups to store data files; an Oracle ASM disk group is a collection of disks that Oracle ASM manages as a unit. Within a disk group, Oracle ASM exposes a file system interface for Oracle database files.

  1. Check datafile logfile and archivelog location in ASM

SQL> select name from v$datafile;
NAME
————————————————————————————————–

+DATA/ORAASM/DATAFILE/system.257.1092813819

+DATA/ORAASM/DATAFILE/sysaux.258.1092813853

+DATA/ORAASM/DATAFILE/undotbs1.259.1092813869

+DATA/ORAASM/86B637B62FE07A65E053F706E80A27CA/DATAFILE/system.270.1092814419

+DATA/ORAASM/86B637B62FE07A65E053F706E80A27CA/DATAFILE/sysaux.271.1092814421

+DATA/ORAASM/DATAFILE/users.260.1092813869

+DATA/ORAASM/86B637B62FE07A65E053F706E80A27CA/DATAFILE/undotbs1.272.1092814421

+DATA/ORAASM/D47CEAB72C2F2513E053867EA8C0538D/DATAFILE/system.276.1092815375

+DATA/ORAASM/D47CEAB72C2F2513E053867EA8C0538D/DATAFILE/sysaux.277.1092815375

+DATA/ORAASM/D47CEAB72C2F2513E053867EA8C0538D/DATAFILE/undotbs1.275.1092815375

+DATA/ORAASM/D47CEAB72C2F2513E053867EA8C0538D/DATAFILE/users.279.1092815459

+DATA/ORAASM/DATAFILE/tblspace.280.1093044407

+DATA/ORAASM/DATAFILE/tblspace.281.1093044531

13 rows selected.

Logfiles :

SQL>  select member from v$logfile;

MEMBER
————————————————————————————————–

+DATA/ORAASM/ONLINELOG/group_3.267.1092813959

+DATA/ORAASM/ONLINELOG/group_3.268.1092813965

+DATA/ORAASM/ONLINELOG/group_2.263.1092813937

+DATA/ORAASM/ONLINELOG/group_2.266.1092813951

+DATA/ORAASM/ONLINELOG/group_1.264.1092813937

+DATA/ORAASM/ONLINELOG/group_1.265.1092813949

6 rows selected.

Archivelogs:

SQL> archive log list

Database log mode        Archive Mode

Automatic archival        Enabled

Archive destination        USE_DB_RECOVERY_FILE_DEST

Oldest online log sequence     14

Next log sequence to archive   16

Current log sequence        16

SQL> show parameter db_recovery_file_dest

NAME      TYPE  VALUE

———————————— ———– ——————————

db_recovery_file_dest      string  +DATA

db_recovery_file_dest_size      big integer 12732M

  1. Create new Datafiles,logfiles, archivelogs in ASM Disks

Datafile:

SQL> create tablespace test datafile’+data’;

Tablespace created.

SQL> select name from v$datafile;

NAME
————————————————————————————————–

+DATA/ORAASM/DATAFILE/system.257.1092813819

+DATA/ORAASM/DATAFILE/sysaux.258.1092813853

+DATA/ORAASM/DATAFILE/undotbs1.259.1092813869

+DATA/ORAASM/86B637B62FE07A65E053F706E80A27CA/DATAFILE/system.270.1092814419

+DATA/ORAASM/86B637B62FE07A65E053F706E80A27CA/DATAFILE/sysaux.271.1092814421

+DATA/ORAASM/DATAFILE/users.260.1092813869

+DATA/ORAASM/86B637B62FE07A65E053F706E80A27CA/DATAFILE/undotbs1.272.1092814421

+DATA/ORAASM/D47CEAB72C2F2513E053867EA8C0538D/DATAFILE/system.276.1092815375

+DATA/ORAASM/D47CEAB72C2F2513E053867EA8C0538D/DATAFILE/sysaux.277.1092815375

+DATA/ORAASM/D47CEAB72C2F2513E053867EA8C0538D/DATAFILE/undotbs1.275.1092815375

+DATA/ORAASM/D47CEAB72C2F2513E053867EA8C0538D/DATAFILE/users.279.1092815459

+DATA/ORAASM/DATAFILE/tblspace.280.1093044407

+DATA/ORAASM/DATAFILE/tblspace.281.1093044531

+DATA/ORAASM/DATAFILE/test.282.1094538795

14 rows selected.

SQL>

SQL> select tablespace_name,file_name from dba_data_files where tablespace_name=’TEST’;

TABLESPACE_NAME   FILE_NAME

TEST                           +DATA/ORAASM/DATAFILE/test.282.1094538795

Logfiles: 

SQL> select member from v$logfile;

MEMBER
————————————————————————————————–

+DATA/ORAASM/ONLINELOG/group_3.267.1092813959

+DATA/ORAASM/ONLINELOG/group_3.268.1092813965

+DATA/ORAASM/ONLINELOG/group_2.263.1092813937

+DATA/ORAASM/ONLINELOG/group_2.266.1092813951

+DATA/ORAASM/ONLINELOG/group_1.264.1092813937

+DATA/ORAASM/ONLINELOG/group_1.265.1092813949

6 rows selected.

SQL> alter database add logfile;

Database altered.

SQL>  select member from v$logfile;

MEMBER
————————————————————————————————–

+DATA/ORAASM/ONLINELOG/group_3.267.1092813959

+DATA/ORAASM/ONLINELOG/group_3.268.1092813965

+DATA/ORAASM/ONLINELOG/group_2.263.1092813937

+DATA/ORAASM/ONLINELOG/group_2.266.1092813951

+DATA/ORAASM/ONLINELOG/group_1.264.1092813937

+DATA/ORAASM/ONLINELOG/group_1.265.1092813949

+DATA/ORAASM/ONLINELOG/group_4.283.1094538977

+DATA/ORAASM/ONLINELOG/group_4.284.1094538977

8 rows selected.

SQL>

  1. Alter / Resize existing Datafiles,logfiles, archivelogs in ASM Disks:

Datafiles:

alter database datafile ‘+DATA/ORAASM/DATAFILE/test.282.1094538795’ resize 150m;

 select file_name,bytes/1024/1024mb from dba_data_files where tablespace_name=’TEST’ order by file_name;

SQL> alter database datafile ‘+DATA/ORAASM/DATAFILE/test.282.1094538795’ resize 150m;

Database altered.

SQL> select file_name,bytes/1024/1024mb from dba_data_files where tablespace_name=’TEST’ order by file_name;

FILE_NAME                                                                       MB

+DATA/ORAASM/DATAFILE/test.282.1094538795           150

SQL> 

Logfiles:
SQL> alter database drop logfile group 4;

Database altered.

SQL> select member from v$logfile;

MEMBER
————————————————————————————————–

+DATA/ORAASM/ONLINELOG/group_3.267.1092813959

+DATA/ORAASM/ONLINELOG/group_3.268.1092813965

+DATA/ORAASM/ONLINELOG/group_2.263.1092813937

+DATA/ORAASM/ONLINELOG/group_2.266.1092813951

+DATA/ORAASM/ONLINELOG/group_1.264.1092813937

+DATA/ORAASM/ONLINELOG/group_1.265.1092813949

6 rows selected.

SQL>

ALTER DATABASE ADD LOGFILE THREAD 1 GROUP 4 (‘+DATA’,’+DATA’) SIZE 1G;

SQL> ALTER DATABASE ADD LOGFILE THREAD 1 GROUP 5 (‘+DATA’,’+DATA’) SIZE 1G;

Database altered.

SQL> select thread#,group#,bytes/1024/1024,members,status from v$log;


   THREAD#     GROUP# BYTES/1024/1024  MEMBERS STATUS

———- ———- ————— ———- —————-

 1     1   200        2 CURRENT

 1     2   200        2 INACTIVE

 1     3   200        2 INACTIVE

 1     4   100        2 UNUSED

 1     5  1024        2 UNUSED

SQL>


Thank you for giving your valuable time to read the above information.

If you want to be updated with all our articles send us the Invitation or Follow us:

Ramkumar’s LinkedIn: https://www.linkedin.com/in/ramkumardba/
LinkedIn Group: https://www.linkedin.com/in/ramkumar-m-0061a0204/
Facebook Page: https://www.facebook.com/Oracleagent-344577549964301
Ramkumar’s Twitter: https://twitter.com/ramkuma02877110
Ramkumar’s Telegram: https://t.me/oracleageant
Ramkumar’s Facebook: https://www.facebook.com/ramkumarram8


ASM Configuration for Standalone Database

Oracle ASM standalone configuration

Description:
In this blog, we are going to see the step-by-step configuration for standalone ASM using the oracle restart method.

Standalone Database:
The Oracle Grid Infrastructure for a standalone server is the Oracle software that provides system support for an Oracle database including volume management, file system, and automatic restart capabilities.

ASM server:
          Automatic Storage Management (ASM) is an integrated, high-performance database file system and disk manager. ASM is based on the principle that the database should manage storage instead of requiring an administrator to do it.

High Level Steps

Adding disk group in Virtual Machine
Grid software Installation
Oracle software installation
ASM standalone DB using the DBCA tool.

Adding Disk Group in Virtual Machine:

Step 1: open virtual machine hardware menu clicks add button:

Step 2:- Select an independent option and click next:

Step 3:- select create a new virtual disk and click next:

Step 4:- select allocate all disk space now option:

Step 5:- Select the folder and create the Disk:

ASM Hard Disk added:

Step 6:- OS-level disk partition :
Power on the virtual machine and check fdisk -l
Partition the disks:
fdisk/dev/sdb
Configure ASMLib using the following command.
oracleasm configure -i
create disk in OS level
/usr/sbin/oracleasm init
/usr/sbin/oracleasm createdisk DISK1 /dev/sdb1

GRID installation pre requests:

Check pre-install
Yum search preinstall

yum install oracle-database-preinstall-19c.x86_64 -y

yum install kmod-oracleasm.x86_64

yum install oracleasm-support.x86_64

Create a grid home directory and unzip the grid home

Add asm groups
[root@asm ~]# groupadd -g 54327 asmdba
[root@asm ~]# groupadd -g 54328 asmoper
[root@asm ~]# groupadd -g 54329 asmadmin
usermod -g oinstall -G dba,oper,backupdba,dgdba,kmdba,asmdba,asmoper,asmadmin,racdba oracle

Install the package cvudisk :
rpm -ivh /u01/app/grid/cv/rpm/cvuqdisk-1.0.10-1.rpm

Run the script:

Oracle Grid software installation:

Click the oracle restart method:

Give any disk group name and redundancy as external change the path as /dev/oracleasm/disks

Select the disk path

Set the password for ASM
Click next to continue.
Click next to continue
check the installation path
check the inventory path

Give root password to run the script automatically:

Summary of grid installation:
Running the installation
completed

Oracle Software installation

Unzip the Oracle 19c software in-home location

Run the ./runInstaller

Step1:- select set up software only option

Step 2:- select single instance database installation

Choose enterprise edition:
specify the location

Summary of installation

oracle software installation completed

ASM Standalone Database creation using DBCA Tool:

Select create database:

Give sid name and create admin password also select container database and mention the db name
check the asm configuration

Summary of db creation
db creation in progress

DB creation complete

Check the ASM standalone database created :


Thank you for giving your valuable time to read the above information.

If you want to be updated with all our articles send us the Invitation or Follow us:

Ramkumar’s LinkedIn: https://www.linkedin.com/in/ramkumardba/
LinkedIn Group: https://www.linkedin.com/in/ramkumar-m-0061a0204/
Facebook Page: https://www.facebook.com/Oracleagent-344577549964301
Ramkumar’s Twitter: https://twitter.com/ramkuma02877110
Ramkumar’s Telegram: https://t.me/oracleageant
Ramkumar’s Facebook: https://www.facebook.com/ramkumarram8 

RENAME DISKGROUP ASM

Rename diskgroup asm 19c

OLD DISKGROUP NAME: DATA
NEW DISKGROUP NAME: ORA_DATA

[oracle@oracleagent:+ASM] sqlplus / as sysasm

SQL*Plus: Release 19.0.0.0.0 – Production on Wed Oct 20 16:38:25 2021
Version 19.12.0.0.0

Copyright (c) 1982, 2021, Oracle. All rights reserved.

Connected to:
Oracle Database 19c Enterprise Edition Release 19.0.0.0.0 – Production
Version 19.12.0.0.0

SYS@+ASM> alter diskgroup DATA dismount;
alter diskgroup DATA dismount
*
ERROR at line 1:
ORA-15032: not all alterations performed
ORA-15027: active use of diskgroup “DATA” precludes its dismount

SYS@+ASM> alter diskgroup DATA dismount force;

Diskgroup altered.

SYS@+ASM> exit
Disconnected from Oracle Database 19c Enterprise Edition Release 19.0.0.0.0 – Production
Version 19.12.0.0.0
[oracle@oracleagent:+ASM] renamedg dgname=DATA newdgname=ORA_DATA verbose=true

Parameters in effect:

Old DG name : DATA
New DG name : ORA_DATA
Phases :
Phase 1
Phase 2
Discovery str : (null)
Clean : TRUE
Raw only : TRUE
renamedg operation: dgname=DATA newdgname=ORA_DATA verbose=true
Executing phase 1
Discovering the group
Performing discovery with string:
Identified disk ASM:ASM Library – Generic Linux, version 2.0.12 (KABI_V2):ORCL:ORA_DATA_0001 with disk number:0 and timestamp (33120742 632048640)
Checking for hearbeat…
Re-discovering the group
Performing discovery with string:
Identified disk ASM:ASM Library – Generic Linux, version 2.0.12 (KABI_V2):ORCL:ORA_DATA_0001 with disk number:0 and timestamp (33120742 632048640)
Checking if the diskgroup is mounted or used by CSS
Checking disk number:0
Generating configuration file..
Completed phase 1
Executing phase 2
Looking for ORCL:ORA_DATA_0001
Modifying the header
Completed phase 2

[oracle@oracleagent:+ASM] sqlplus / as sysasm

SQL*Plus: Release 19.0.0.0.0 – Production on Wed Oct 20 16:41:16 2021
Version 19.12.0.0.0

Copyright (c) 1982, 2021, Oracle. All rights reserved.

Connected to:
Oracle Database 19c Enterprise Edition Release 19.0.0.0.0 – Production
Version 19.12.0.0.0

SYS@+ASM> alter diskgroup ORA_DATA mount force;

Diskgroup altered.

SYS@+ASM> exit
Disconnected from Oracle Database 19c Enterprise Edition Release 19.0.0.0.0 – Production
Version 19.12.0.0.0
[oracle@oracleagent:+ASM] ps -ef | grep pmon
oracle 1547 1 0 Aug18 ? 00:02:44 asm_pmon_+ASM

[oracle@oracleagent:+ASM] asmcmd
ASMCMD> lsdg
State Type Rebal Sector Logical_Sector Block AU Total_MB Free_MB Req_mir_free_MB Usable_file_MB Offline_disks Voting_files Name
MOUNTED EXTERN N 512 512 4096 4194304 511996 511896 0 511896 0 N ORA_DATA/
ASMCMD>


Thank you for giving your valuable time to read the above information.

If you want to be updated with all our articles send us the Invitation or Follow us:

Ramkumar’s LinkedIn: https://www.linkedin.com/in/ramkumardba/
LinkedIn Group: https://www.linkedin.com/in/ramkumar-m-0061a0204/
Facebook Page: https://www.facebook.com/Oracleagent-344577549964301
Ramkumar’s Twitter: https://twitter.com/ramkuma02877110
Ramkumar’s Telegram: https://t.me/oracleageant
Ramkumar’s Facebook: https://www.facebook.com/ramkumarram8

19c GRID UPGRADE

Oracle Grid Infrastructure Upgrade:

We can do upgrade Oracle Grid Infrastructure below ways:

  • Rolling Upgrade which involves upgrading individual nodes without stopping Oracle Grid Infrastructure on other nodes in the cluster.
  • Non-rolling Upgrade which involves bringing down all the nodes except one. A complete cluster outage occurs while the root script stops the old Oracle Clusterware stack and starts the new Oracle Clusterware stack on the node where you initiate the upgrade. After upgrade is completed, the new Oracle Clusterware is started on all the nodes.

Note that some services are disabled when one or more nodes are in the process of being upgraded. All upgrades are out-of-place upgrades, meaning that the software binaries are placed in a different Grid home from the Grid home used for the prior release.

  • When you upgrade to Oracle Grid Infrastructure 19c, you upgrade to an Oracle Standalone Cluster configuration.
  • You can use either Oracle ASM or a shared file system to store OCR and voting files on Oracle Standalone Cluster deployments. If storage for OCR and voting files is other than Oracle ASM on other cluster types, then you need to migrate OCR and voting files to Oracle ASM before upgrading to Oracle Grid Infrastructure 19c.

Restrictions for Oracle Grid Infrastructure Upgrades:

  • Oracle Grid Infrastructure upgrades are always out-of-place upgrades. You cannot perform an in-place upgrade of Oracle Grid Infrastructure to existing homes.
  • The same user that owned the earlier release Oracle Grid Infrastructure software must perform the Oracle Grid Infrastructure 19c upgrade.
  • Oracle ASM and Oracle Clusterware both run in the Oracle Grid Infrastructure home.
  • When you upgrade Oracle Grid Infrastructure, you upgrade to an Oracle Flex Cluster configuration.
  • Do not delete directories in the Grid home. For example, do not delete the directory Grid_home/OPatch. If you delete the directory, then the Grid infrastructure installation owner cannot use OPatch utility to patch the grid home, and OPatch displays the error message “‘checkdir’ error: cannot create Grid_home/OPatch”.
  • To upgrade existing Oracle Grid Infrastructure installations to Oracle Grid Infrastructure 19c, you must first verify if you need to apply any mandatory patches for upgrade to succeed.Oracle recommends that you use the Cluster Verification Utility tool (CVU) to check if there are any patches required for upgrading your existing Oracle Grid Infrastructure or Oracle RAC database installations. See Using CVU to Validate Readiness for Oracle Clusterware Upgrades for steps to check readiness.
  • The software in the 19c Oracle Grid Infrastructure home is not fully functional until the upgrade is completed. Running srvctl, crsctl, and other commands from the new Grid homes are not supported until the final rootupgrade.sh script is run and the upgrade is complete across all nodes.To manage databases in existing earlier release database homes during the Oracle Grid Infrastructure upgrade, use the srvctl from the existing database homes.
  • To upgrade existing Oracle Clusterware installations to Oracle Grid Infrastructure 19c cluster, your release must be greater than or equal to Oracle Grid Infrastructure 11g Release 2 (11.2.0.4).

Upgrading Shared Grid Homes

  • If the existing Oracle Clusterware home is a shared home, then you can use a non-shared home for the Oracle Grid Infrastructure for a cluster home for Oracle Clusterware and Oracle ASM 19c.
  • You can perform upgrades on a shared Oracle Clusterware home.
Check current Oracle Cluster ware installation readiness for upgrades using Cluster
Verification Utility (CVU)
 
From the 19c Grid Infrastructure home execute:
[oracle@rac01 grid]$ ./runcluvfy.sh stage -pre hacfg

Verifying Physical Memory ...PASSED
Verifying Available Physical Memory ...PASSED
Verifying Swap Size ...PASSED
Verifying Free Space: rac01:/usr,rac01:/etc,rac01:/sbin ...PASSED
Verifying Free Space: rac01:/var ...PASSED
Verifying Free Space: rac01:/tmp ...PASSED
Verifying User Existence: oracle ...
Verifying Users With Same UID: 1001 ...PASSED
Verifying User Existence: oracle ...PASSED
Verifying Group Existence: dba ...PASSED
Verifying Group Existence: oinstall ...PASSED
Verifying Group Membership: oinstall(Primary) ...PASSED
Verifying Group Membership: dba ...PASSED
Verifying Run Level ...PASSED
Verifying Architecture ...PASSED
Verifying OS Kernel Version ...PASSED
Verifying OS Kernel Parameter: semmsl ...PASSED
Verifying OS Kernel Parameter: semmns ...PASSED
Verifying OS Kernel Parameter: semopm ...PASSED
Verifying OS Kernel Parameter: semmni ...PASSED
Verifying OS Kernel Parameter: shmmax ...PASSED
Verifying OS Kernel Parameter: shmmni ...PASSED
Verifying OS Kernel Parameter: shmall ...PASSED
Verifying OS Kernel Parameter: file-max ...PASSED
Verifying OS Kernel Parameter: ip_local_port_range ...PASSED
Verifying OS Kernel Parameter: rmem_default ...PASSED
Verifying OS Kernel Parameter: rmem_max ...PASSED
Verifying OS Kernel Parameter: wmem_default ...PASSED
Verifying OS Kernel Parameter: wmem_max ...PASSED
Verifying OS Kernel Parameter: aio-max-nr ...PASSED
Verifying Package: kmod-20-21 (x86_64) ...PASSED
Verifying Package: kmod-libs-20-21 (x86_64) ...PASSED
Verifying Package: binutils-2.23.52.0.1 ...PASSED
Verifying Package: compat-libcap1-1.10 ...PASSED
Verifying Package: libgcc-4.8.2 (x86_64) ...PASSED
Verifying Package: libstdc++-4.8.2 (x86_64) ...PASSED
Verifying Package: libstdc++-devel-4.8.2 (x86_64) ...PASSED
Verifying Package: sysstat-10.1.5 ...PASSED
Verifying Package: gcc-c++-4.8.2 ...PASSED
Verifying Package: ksh ...PASSED
Verifying Package: make-3.82 ...PASSED
Verifying Package: glibc-2.17 (x86_64) ...PASSED
Verifying Package: glibc-devel-2.17 (x86_64) ...PASSED
Verifying Package: libaio-0.3.109 (x86_64) ...PASSED
Verifying Package: libaio-devel-0.3.109 (x86_64) ...PASSED
Verifying Package: nfs-utils-1.2.3-15 ...PASSED
Verifying Package: smartmontools-6.2-4 ...PASSED
Verifying Package: net-tools-2.0-0.17 ...PASSED
Verifying Package: compat-libstdc++-33-3.2.3 (x86_64) ...PASSED
Verifying Package: libxcb-1.11 (x86_64) ...PASSED
Verifying Package: libX11-1.6.3 (x86_64) ...PASSED
Verifying Package: libXau-1.0.8 (x86_64) ...PASSED
Verifying Package: libXi-1.7.4 (x86_64) ...PASSED
Verifying Package: libXtst-1.2.2 (x86_64) ...PASSED
Verifying Users With Same UID: 0 ...PASSED
Verifying Current Group ID ...PASSED
Verifying Root user consistency ...PASSED

Pre-check for Oracle Restart configuration was successful.

CVU operation performed: stage -pre hacfg
Date: Feb 20, 2021 09:41:39 AM
CVU home: /u02/app/oracle/product/19.3.0.0/grid/
User: oracle
[oracle@rac01 grid]$

Start the 19c Grid Infrastructure upgrade:

[oracle@rac01 grid]$ ./gridSetup.sh

In Pre-req we are facing this issue. We need to apply these two patches then only we can go ahead for 19c grid upgrade.

Update opatch version and apply patches 28553832 and 27006180.

Now, we have grid setup in directory /u02/app/grid/product/19.3.0/grid , before proceed with the installation. let’s check current Grid Infrastructure version.

[oracle@rac01 ~]$ crsctl query has releaseversion
Oracle High Availability Services release version on the local node is [12.2.0.1.0]
[oracle@rac01 ~]$ crsctl query has softwareversion
Oracle High Availability Services version on the local node is [12.2.0.1.0]

As we can see, the current version of Grid Infrastructure is 12.2.0.1.0 that is 12cR2.

We can initiate installation wizard by running below command.

Make sure you bring down your all database instance(s) before initiating upgrade. If you are trying to upgrade grid without bringing down database instance

[oracle@rac01 ~]$ /u02/app/grid/product/19.3.0/grid/./gridSetup.sh
Launching Oracle Grid Infrastructure Setup Wizard...

  • Select Upgrade Oracle Gird Infrastructure, and click NEXT

  • Select if you’ve configured EM(Cloud Control) agent on you server, else without selecting any option click NEXT.

  • As we can see, our Grid Infrastructure Home is by default the location where we’ve copied grid setup, verify Oracle base for Grid Infrastructure and click NEXT.

  • Here you can provide your root credentials which will automatically run root script during installation, optionally you can use sudo as well.

  • Here If  we get warning for Physical Memory in prerequisite check, as Oracle recommends 8 GB of minimum physical memory for Grid Infrastructure. Here we have sufficient memory so let’s click NEXT.

  • Summary screen, verify your selections and modify if needed, then click NEXT.

  • Installation has began now.

  • Here we get the prompt to run root script  , If we provided earlier using the credentials It will ask yes or no prompt but in our case we didn’t provided the credentials so we need to run manually here.
  • Once you run root.sh script below logs will run in our putty session.
[oracle@rac01:+ASM] sudo /u02/app/oracle/product/19.3.0.0/grid/rootupgrade.sh
[sudo] password for oracle:
Performing root user operation.

The following environment variables are set as:
ORACLE_OWNER= oracle
ORACLE_HOME= /u02/app/oracle/product/19.3.0.0/grid

Enter the full pathname of the local bin directory: [/usr/local/bin]:
The contents of "dbhome" have not changed. No need to overwrite.
The file "oraenv" already exists in /usr/local/bin. Overwrite it? (y/n)
[n]: y
Copying oraenv to /usr/local/bin ...
The file "coraenv" already exists in /usr/local/bin. Overwrite it? (y/n)
[n]: y
Copying coraenv to /usr/local/bin ...

Entries will be added to the /etc/oratab file as needed by
Database Configuration Assistant when a database is created
Finished running generic part of root script.
Now product-specific root actions will be performed.
Using configuration parameter file: 
/u02/app/oracle/product/19.3.0.0/grid/crs/install/crsconfig_params
The log of current session can be found at:
/u02/app/oracle/crsdata/rac01/crsconfig/roothas_2021-02-20_10-02-12AM.log
2021/02/20 10:02:15 CLSRSC-595: Executing upgrade step 1 of 12: 'UpgPrechecks'.
2021/02/20 10:02:19 CLSRSC-595: Executing upgrade step 2 of 12: 'GetOldConfig'.
2021/02/20 10:02:23 CLSRSC-595: Executing upgrade step 3 of 12: 'GenSiteGUIDs'.
2021/02/20 10:02:23 CLSRSC-595: Executing upgrade step 4 of 12: 'SetupOSD'.
2021/02/20 10:02:23 CLSRSC-595: Executing upgrade step 5 of 12: 'PreUpgrade'.

ASM has been upgraded and started successfully.

2021/02/20 10:03:30 CLSRSC-595: Executing upgrade step 6 of 12: 'UpgradeAFD'.
2021/02/20 10:03:31 CLSRSC-595: Executing upgrade step 7 of 12: 'UpgradeOLR'.
clscfg: EXISTING configuration version 0 detected.
Creating OCR keys for user 'oracle', privgrp 'oinstall'..
Operation successful.
2021/02/20 10:03:35 CLSRSC-595: Executing upgrade step 8 of 12: 'UpgradeOCR'.
LOCAL ONLY MODE
Successfully accumulated necessary OCR keys.
Creating OCR keys for user 'root', privgrp 'root'..
Operation successful.
CRS-4664: Node rac01 successfully pinned.
2021/02/20 10:03:37 CLSRSC-595: Executing upgrade step 9 of 12: 'CreateOHASD'.
2021/02/20 10:03:39 CLSRSC-595: Executing upgrade step 10 of 12: 'ConfigOHASD'.
2021/02/20 10:03:39 CLSRSC-329: Replacing Clusterware entries in file 
'oracle-ohasd.service'
2021/02/20 10:03:57 CLSRSC-595: Executing upgrade step 11 of 12: 'UpgradeSIHA'.
rac01 2021/02/20 10:04:39 /u02/app/oracle/crsdata/rac01/olr/backup_20210220_100439.olr 
724960844
rac01 2020/08/24 00:18:44 
/u01/app/oracle/product/12.2.0.1/grid/cdata/rac01/backup_20200824_001844.olr 1977687601
2021/02/20 10:04:39 CLSRSC-595: Executing upgrade step 12 of 12: 'InstallACFS'.
2021/02/20 10:07:49 CLSRSC-327: 
Successfully configured Oracle Restart for a standalone server.
  • And here installation finished.

We have successfully upgraded Oracle Grid Infrastructure 12cR2 to Oracle Grid Infrastructure 19c on our database.

Post checks:

  • Change ORACLE_HOME pointing to new 19c binaries in bash profile.
  • If your listener entry is in old ORACLE_HOME change that to new ORACLE_HOME.
  • Let’s now invoke SQL*Plus and check if we can login to Oracle Grid Infrastructure 19c.

Thank you for giving your valuable time to read the above information.
If you want to be updated with all our articles send us the Invitation or Follow us:
Ramkumar’s LinkedIn: https://www.linkedin.com/in/ramkumardba/
LinkedIn Group: https://www.linkedin.com/in/ramkumar-m-0061a0204/
Facebook Page: https://www.facebook.com/Oracleagent-344577549964301
Ramkumar’s Twitter : https://twitter.com/ramkuma02877110
Ramkumar’s Telegram: https://t.me/oracleageant
Ramkumar’s Facebook: https://www.facebook.com/ramkumarram8