This document describes steps to create a database link between Oracle to MySQL (Heterogeneous Services) / Oracle Gateway, Regarding Oracle Documentation Gateways will integrate with any number of non-Oracle systems from an Oracle application.
All bold statements are shell commands or configuration steps.
2. Database Link Configuration
A database link is a schema object in one database that enables you to access objects on another database. The other database need not be an Oracle Database system. However, to access non-Oracle systems you must use Oracle Heterogeneous Services.
It is a connection between two physical database servers that allows a client to access them as one logical database.
2.1 Configure Database Link from ORACLE to MySQL
To start Configure Database Link we need to follow the below steps:
Step #1:-
Determine the Version for dg4odbc on the Operating system using
>file $ORACLE_HOME/bin/dg4odbc
This Command Explain which version of ODBC Driver.
Step #2:-
Install unixODBC and MySQL connector (This step should be done as root user).
The Most Important Thing in the above output is to check if there is nothing in the library “Not Found”.
Step #7:-
(As Oracle User).
Test connection using odbc only, Only on OS Level
# ./isql –v MySQL
The below is output:-
Connected
Until this step we didn’t do anything only configure odbc, next step will explain how to configure Oracle.
Step #8:-
Configuration for Oracle Start with initSID.ora file. Oracle already create a template located in $ORACLE_HOME/hs/admin just copy it with the new name, the default one is initdg4odbc.ora we can leave without change and edit it.
Edit the file and set the new variables like the below:-
This Step will describe how to configure Listener.ora, You can download Listener.ora and copy/Paste the entire to make sure there’s nothing wrong or you can create your own. Open Listener.ora and add the below line depending on your Configuration:-
Standby Out Off syncDescription: In this blog, we are going to see standby log out off sync how to check and sync the primary and standby logs.
Standby Log Sync: The primary database logs are synced with the standby database in case any issue delay happens in log sync we restart the MRP process and defer enable the log_dest_2 location in the primary database.
Overall Steps:-
1. Bring Down the standby database. 2. Create a user and do multiple log switches in the primary database. 3. Start the standby database, and check the log difference. 4. primary database defers and enables the dest 2. 5. Restart the MRP process in the standby database. 6. Check the log Sync status.
Step 2:- Create user and do multiple log switches in the primary database.
Check current archive log status: SQL> archive log list; Database log mode Archive Mode Automatic archival Enabled Archive destination USE_DB_RECOVERY_FILE_DEST Oldest online log sequence 9 Next log sequence to archive 11 Current log sequence 11
Create a user and insert the table. SQL> create user agent identified by agent; SQL> alter user agent default tablespace users quota unlimited on users; SQL> grant connect, resource to agent; SQL> conn agent/agent Connected. SQL> show user USER is “AGENT” SQL> create table agent1 as select * from user_tables; SQL> conn / as sysdba Connected.
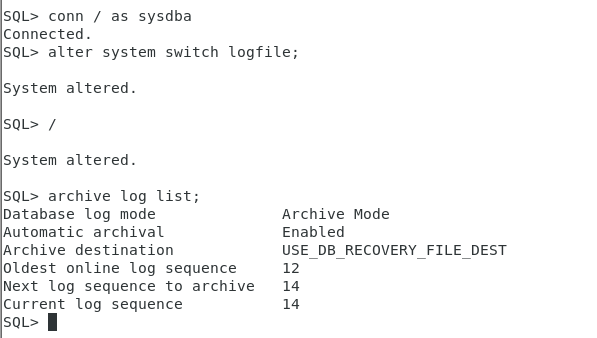
Do multiple log switches. SQL> alter system switch logfile;
System altered.
SQL> /
System altered.
Check the archive log status. SQL> archive log list; Database log mode Archive Mode Automatic archival Enabled Archive destination USE_DB_RECOVERY_FILE_DEST Oldest online log sequence 12 Next log sequence to archive 14 Current log sequence 14 SQL>
Step 3:- Start the standby database, and check the log difference.
Total System Global Area 1258290752 bytes Fixed Size 8896064 bytes Variable Size 738197504 bytes Database Buffers 503316480 bytes Redo Buffers 7880704 bytes Database mounted. Database opened.
Check the log sync different. SQL> SELECT ARCH.THREAD# “Thread”, ARCH.SEQUENCE# “Last Sequence Received”, APPL.SEQUENCE# “Last Sequence Applied”, (ARCH.SEQUENCE# – APPL.SEQUENCE#) “Difference” FROM(SELECT THREAD# ,SEQUENCE# FROM V$ARCHIVED_LOG WHERE (THREAD#,FIRST_TIME ) IN (SELECT THREAD#,MAX(FIRST_TIME) FROM V$ARCHIVED_LOG GROUP BY THREAD#)) ARCH, (SELECT THREAD# ,SEQUENCE# FROM V$LOG_HISTORY WHERE (THREAD#,FIRST_TIME ) IN (SELECT THREAD#,MAX(FIRST_TIME) FROM V$LOG_HISTORY GROUP BY THREAD#)) APPL WHERE ARCH.THREAD# = APPL.THREAD# ORDER BY 1;
Step 4:-Primary database defer and enable the dest 2.
SQL> alter system set log_archive_dest_state_2=defer;
System altered.
SQL> alter system set log_archive_dest_state_2=enable;
System altered.
Step 5:- Restart the MRP process in the standby database.
SQL> alter database recover managed standby database disconnect nodelay;
Database altered.
Step 6:- Check the log sync status.
SQL> SELECT ARCH.THREAD# “Thread”, ARCH.SEQUENCE# “Last Sequence Received”, APPL.SEQUENCE# “Last Sequence Applied”, (ARCH.SEQUENCE# – APPL.SEQUENCE#) “Difference” FROM(SELECT THREAD# , SEQUENCE# FROM V$ARCHIVED_LOG WHERE (THREAD#, FIRST_TIME ) IN (SELECT THREAD#, MAX(FIRST_TIME) FROM V$ARCHIVED_LOG GROUP BY THREAD#)) ARCH, (SELECT THREAD# , SEQUENCE# FROM V$LOG_HISTORY WHERE (THREAD#, FIRST_TIME ) IN (SELECT THREAD#, MAX(FIRST_TIME) FROM V$LOG_HISTORY GROUP BY THREAD#)) APPL WHERE ARCH.THREAD# = APPL.THREAD# ORDER BY 1; 2 3 4
Upgradation is the process of replacing an older version/software with a new version of the product. It transforms the existing Oracle Database Environment into a new Environment. Upgradation can be done within the similar OS or with a different platform.
NOTE: It is important that we should apply the latest PSU or proactive bundle patch, RU, or RUR patch before starting an upgrade.
Why do we need to upgrade?
Upgrading a database generally fixes the bugs, internal errors and other technical issues which can be identified and resolved as soon as possible thereby it reduces the downtime.
You can perform a direct upgrade to the new release from the following releases: • 11.2.0.4 • 12.1.0.1 and 12.1.0.2 • 12.2.0.1
For example: Here I am converting my db from 12.2.0 (base version) to a 19.0.0 (higher version)
Types of Upgrade:
We can upgrade our DB in any one of the following methods,
1)DBUA (Database Upgrade Assistant)
2)Manual Method
3)Data Pump
4)Transportable Tablespaces
DATABASE UPGRADE ASSISTANT (DBUA) :
DBUA is a GUI method that checks all pre-requisties themselves.it checks for all the pre-requisties such as configuring the listener, recompiling the invaid objects, upgrading the time zone, running the preupgrade_fixups.sql,postupgrade_fixups.sql, configuring the enterprise manager (EM) database express, creating a Guaranteed Restore Point and all the things by itself.DBUA only performs the upgradation process if it satisfies all the above-mentioned things.
In the manual method, we should perform all the pre-requisties things manually.
Overview of steps to Upgrade a Database:
PRE-UPGRADE STEPS:
Create a new directory called backup, Take a backup of listener.ora,tnsnames.ora,spfile and password files ,then move all the files to the newly created directory called backup.
Create a new directory called upgrade,Run the preupgrade.jar file which is in the location
(/u01/app/oracle/product/12.2.0.1/db_1/jdk/bin/java -jar /u02/app/oracle/product/19.0.0/dbhome_1/rdbms/admin/preupgrade.jar),Move the summary of the preupgrade.script to the upgrade directory.
3.Three files named preupgrade.log,preupgrade_fixups.sql,postupgrade_fixups.sql files will be created after running the preupgrade.script.
4.We should execute the below scripts,
Before upgrade – @/u01/preupgrade/preupgrade_fixups.sql
After upgrade – @/u01/preupgrade/postupgrade_fixups.sql
5.Then check the preupgrade.log whether it is completed without any errors.
6. Verify the tablespace sizes for upgrade. (enable the AUTO EXTENT ON and set the maximum size for tablespaces)
7. Gather the dictionary statistics query to get the statistical data of fixed objects. we should gather dictionary statistics before and after the upgrade to maintain better DB performance.Because dictionary tables are modified and created during the upgrade.
8.Purge the recyclebin
9.Refresh all the materialised views before upgrade.
10.Run preupgrade_fixups.sql (/u01/upgrade/preupgrade_fixups.sql) before the upgrade.
11. You should enable the archive log list.
12.Create the flashback restore point before performing upgrade,it is important suppose if dbupgrade fails you can recover the database from this restore point.
13.Set the db_recovery_file_dest_size=10GB
UPGRADE TASK:
After we have completed all our pre-upgrade steps, Now it is time to upgrade our DB using dbua(GUI Method), All the steps will be taken by this.
Once you run the dbua command ,a log will be generated in the location (/u01/app/oracle/cfgtoollogs/dbua/upgrade2020-04-23_10-46-32PM) we can check this log file if any error occurs)
14.We should choose the database which is to be upgraded for 19c.
15. Next choose to Create a Guranteed Restore Point or RMAN backup in case of failure of upgrade. Double-check our restore point
16. Configure a new listener or upgrade the existing listener which is running up from 12.2.20.1 home to target 19c home.
17.Check if all the pre-requisites that we mentioned are correctly mentioned in the GUI.
POST UPGRADE STEPS:
18.Put an entry of current database in the vi /etc/oratab file.
19. Verify the timezone version of the upgraded database. (it should be changed to 32)
20. Then check for any invalid objects in the database after the upgrade.
21.We have to verify the DBA_REGISTRY view,it displays the information about the components loaded in the database.
22. Now we can drop the restore point that we have created already before the upgrade.
23.Update the compatible parameter value, it will be set in the base database version we have to update the upgraded db version in the compatible parameter value.
24. Finally check the listener.ora and tnsnames.ora files it should be updated to an upgraded db version.
Step:1 create a new directory for backup and for the upgrade.
Before upgrade: Log into the database and execute the preupgrade fixups
@/u01/preupgrade/preupgrade_fixups.sql
After the upgrade: Log into the database and execute the postupgrade fixups
@/u01/preupgrade/postupgrade_fixups.sql
Preupgrade complete: 2021-01-30T01:54:48
Step:4 Log in to the database and run the preupgrade_fixups.sql
[oracle@orcldbs db_1]$ !sq
sqlplus / as sysdba
SQL*Plus: Release 12.2.0.1.0 Production on Sat Jan 30 01:55:09 2021
Copyright (c) 1982, 2016, Oracle.  All rights reserved.
Connected to:
Oracle Database 12c Enterprise Edition Release 12.2.0.1.0 - 64bit Production
SQL> @/u01/preupgrade/preupgrade_fixups.sql
Executing Oracle PRE-Upgrade Fixup Script
Auto-Generated by:       Oracle Preupgrade Script
                         Version: 19.0.0.0.0 Build

Generated on:            2021-01-30 01:54:46
For Source Database:        GERMANY
Source Database Version: 12.2.0.1.0
For Upgrade to Version:  19.0.0.0.0
Preup                             Preupgrade
Action                            Issue Is
Number  Preupgrade Check Name     Remedied    Further DBA Action
------  ------------------------  ----------  --------------------------------
    1.  dictionary_stats          YES         None.

    2.  pre_fixed_objects         YES         None.

    3.  tablespaces_info          NO          Informational only.
                                              Further action is optional.
    4.  rman_recovery_version     NO          Informational only.
                                             Further action is optional.

PL/SQL procedure successfully completed.
Step:5 Gather the dictionary statistics it should be gathered after performing the upgrade.
SQL> SET ECHO ON;
SET SERVEROUTPUT ON;
EXECUTE DBMS_STATS.GATHER_DICTIONARY_STATS;

PL/SQL procedure successfully completed.
Step:6 Purge the recycle bin.it is mainly used to release the storage space used,since we have enabled the GRP we can purge the recycle bin.
PURGE DBA_RECYCLEBIN;

SQL>DBA_RECYCLEBIN purged.
Step:7 Refreshing the Materialised views update all its indexes.
 SQL>  declare
list_failures integer(3) :=0;
begin
DBMS_MVIEW.REFRESH_ALL_MVIEWS(list_failures,'C','', TRUE, FALSE);
end;

PL/SQL procedure successfully completed.
Step:8 Enable the archive log mode it is mandatory to perform an db upgrade.
SQL> archive log list
Database log mode              No Archive Mode
Automatic archival             Disabled
Archive destination            /u01/app/oracle/product/12.2.0.1/db_1/dbs/arch
Oldest online log sequence     1
Current log sequence           2
SQL> shut immediate
Database closed.
Database dismounted.
ORACLE instance shut down.
SQL> startup mount
ORACLE instance started.
Total System Global Area 2432696320 bytes
Fixed Size                  8623592 bytes
Variable Size             654314008 bytes
Database Buffers         1761607680 bytes
Redo Buffers                8151040 bytes
Database mounted.

SQL> alter database archivelog;

Database altered.

SQL> archive log list;

Database log mode              Archive Mode
Automatic archival             Enabled
Archive destination            /u01/app/oracle/product/12.2.0.1/db_1/dbs/arch
Oldest online log sequence     1
Next log sequence to archive   2
Current log sequence           2

SQL> show parameter rec

NAME                                 TYPE        VALUE
------------------------------------ ----------- ------------------------------
buffer_pool_recycle                  string

control_file_record_keep_time        integer     7

db_recovery_file_dest                string

db_recovery_file_dest_size           big integer 0

db_recycle_cache_size                big integer 0

db_unrecoverable_scn_tracking        boolean     TRUE

ldap_directory_access                string      NONE

ldap_directory_sysauth               string      no

recovery_parallelism                 integer     0

recyclebin                           string      on

remote_recovery_file_dest            string

SQL> select flashback_on from v$database;

FLASHBACK_ON
------------------
NO


SQL> select name,open_mode,log_mode from v$database;

NAME      OPEN_MODE            LOG_MODE
--------- -------------------- ------------
GERMANY   MOUNTED              ARCHIVELOG


SQL> show parameter db_recovery_file_dest_size

NAME                                 TYPE        VALUE
------------------------------------ ----------- ------------------------------
db_recovery_file_dest_size           big integer 0

SQL> alter database open;

Database altered.
Step:9 set the db_recovery_fil_dest_size to 10 gb for recovery purpose.
SQL> alter system set db_recovery_file_dest_size=10G;

System altered.
Step:10 create the GRP (Guarantee Restore Point) ,suppose if any failure occurs during upgradation we can easily go to the before upgrade of db (ie looks like as if our db before upgradation)it is used for recovery purpose.
SQL> create restore point pre_upgrade guarantee flashback database;

Restore point created.
SQL> select NAME,GUARANTEE_FLASHBACK_DATABASE,TIME from V$restore_point;

NAME                                                                      TIME                                                        GUA

PRE_UPGRADE                                            30-JAN-21 02.26.08.000000000 AM             YES
Step:11 We have done all the things to be done before the upgrade. Now it’s time to run the DBUA a GUI Utility to perform the upgrade.
11.1 you have to choose the database which you need to upgrade, here I am choosing Germany db for upgrade to 19.0.0 which is in version 12.2.0 and click next.
11.2 second window shows the Pre Upgrade Recommendations and Post Upgrade Recommendations and then click next.
11.3 in this screen click the following checkboxes,
Enable Parallel Upgrade
Recompile Invalid Objects During Post Upgrade
Upgrade Timezone Data
After that you have to browse the locations of preupgrade_fixups.sql,postupgrade_fixups.sql
11.4 In this screen you can specify any of the recovery option for the database in case of upgrade failure.
Here I am using Flashback and Guaranteed Restore Point.
There are methods are also available such that RMAN backup , use latest available full RMAN backup. if you have your own backup and restore strategy you can also use that.
11.5 Select the 12c listener, it should be up and running.
11.6 select the Configure Enterprise Manager (EM) database express check box and click next.
11.7 Finally this window shows the Database Upgrade summary you can verify all your selections that you have choose above are correctly mentioned and proceed further.
11.8 After that Oracle upgrade process starts.
11.9 when the upgradation process is over it give an upgrade results which db is upgraded from which version to which version. You can check here for information.
Step:12 Put an entry of the current database in the vi /etc/oratab file.
SQL*Plus: Release 19.0.0.0.0 - Production on Sat Jan 30 04:09:40 2021 Version 19.3.0.0.0 Copyright (c) 1982, 2019, Oracle. All rights reserved. Connected to: Oracle Database 19c Enterprise Edition Release 19.0.0.0.0 - Production Version 19.3.0.0.0
SQL> SELECT name from v$database;
NAME ---------------- GERMANY
Step:13 check the timezone version for the upgraded db (GERMANY) it has changed from 26(12c) to 32(19c).
SQL>  SELECT version FROM v$timezone_file;

   VERSION
----------------
     32
Step:14 Check for any invalid objects in upgraded database.
select count(1) from dba_objects where status='INVALID';

  COUNT(1)
------------------
     0
Step:15 Verify the dba_registry, it should be verified before and after the upgrade because it display information about the components loaded in the database.
SQL> col COMP_ID for a10 col COMP_NAME for a40 col VERSION for a15 set lines 180 set pages 999
select COMP_ID,COMP_NAME,VERSION,STATUS from dba_registry;
COMP_ID COMP_NAME VERSION STATUS ---------- ---------------------------------------- --------------- --------------------------------------------
[oracle@orcldbs ~]$ [oracle@orcldbs ~]$ lsnrctl status LSNRCTL for Linux: Version 19.0.0.0.0 - Production on 30-JAN-2021 04:17:17 Copyright (c) 1991, 2019, Oracle. All rights reserved. Connecting to (DESCRIPTION=(ADDRESS=(PROTOCOL=TCP)(HOST=192.168.1.26)(PORT=1521)))
STATUS of the LISTENER ------------------------
Alias LISTENER Version TNSLSNR for Linux: Version 19.0.0.0.0 - Production Start Date 30-JAN-2021 02:49:58 Uptime 0 days 1 hr. 27 min. 18 sec Trace Level off Security ON: Local OS Authentication SNMP OFF
Services Summary... Service "oraprod" has 2 instance(s). Instance "oraprod", status UNKNOWN, has 1 handler(s) for this service... Instance "oraprod", status READY, has 1 handler(s) for this service...
Service "oraprodXDB" has 1 instance(s). Instance "oraprod", status READY, has 1 handler(s) for this service...
Service "germany" has 1 instance(s). Instance "germany", status READY, has 1 handler(s) for this service...
Service "germanyXDB" has 1 instance(s). Instance "germany", status READY, has 1 handler(s) for this service...
The command completed successfully [oracle@orcldbs ~]$
Thank you for giving your valuable time to read the above information. If you want to be updated with all our articles send us the Invitation or Follow us: Ramkumar’s LinkedIn: https://www.linkedin.com/in/ramkumardba/ LinkedIn Group: https://www.linkedin.com/in/ramkumar-m-0061a0204/ Facebook Page: https://www.facebook.com/Oracleagent-344577549964301 Ramkumar’s Twitter: https://twitter.com/ramkuma02877110 Ramkumar’s Telegram: https://t.me/oracleageant Ramkumar’s Facebook: https://www.facebook.com/ramkumarram8
In Putty session while we execute ./dbca command we will get this screen.
STEP 1:
select create database option then click next button
STEP 2:
We need to supply Global database name and password
STEP 3:
click finish button to complete database creation
Once progress completed we will get below screen
STEP 5:
Now the database has been created. We can check by logging in.
Thank you for giving your valuable time to read the above information.
If you want to be updated with all our articles send us the Invitation or Follow us:
Ramkumar’s LinkedIn: https://www.linkedin.com/in/ramkumardba/
LinkedIn Group: https://www.linkedin.com/in/ramkumar-m-0061a0204/
Facebook Page: https://www.facebook.com/Oracleagent-344577549964301
Ramkumar’s Twitter : https://twitter.com/ramkuma02877110
Ramkumar’s Telegram: https://t.me/oracleageant
Ramkumar’s Facebook: https://www.facebook.com/ramkumarram8
In Putty session while we execute ./dbca command we will get this screen. In that screen we need to select manage Pluggable databases option to create new PDB database.
Select Create a Pluggable database option.
Click finish button to complete database creation.
Click on new Pluggable database
Enter Pluggable database name and passwords
We need to chose storage locations. click on next button
Check on the summary of inputs in Pluggable databases
Once all details confirmed click on finish button to progress on installation.
Once progress completed PDB100 plugged in.
We can check pluggable databases in putty session whether its installed properly.
Now we can see that pluggable databases installed successfully.
Thank you for giving your valuable time to read the above information.
If you want to be updated with all our articles send us the Invitation or Follow us:
Ramkumar’s LinkedIn: https://www.linkedin.com/in/ramkumardba/
LinkedIn Group: https://www.linkedin.com/in/ramkumar-m-0061a0204/
Facebook Page: https://www.facebook.com/Oracleagent-344577549964301
Ramkumar’s Twitter : https://twitter.com/ramkuma02877110
Ramkumar’s Telegram: https://t.me/oracleageant
Ramkumar’s Facebook: https://www.facebook.com/ramkumarram8