The Server is not able to service this request: [Socket:000445]Connection rejected, filter blocked Socket, weblogic.security.net.FilterException: [Security:090220]rule 2
The Server is not able to service this request: [Socket:000445]Connection rejected, filter blocked Socket, weblogic.security.net.FilterException
cd $FMW_HOME/user_projects/domains/EBS_domain_PROD/config
cp config.xml config.xml_org
erpr12.appsdba.info * * allow
Update deny to allow in the file config.xml
old
0.0.0.0/0 * * deny
New
0.0.0.0/0 * * allow
Bounce the admin server
Thank you for giving your valuable time to read the above information.
If you want to be updated with all our articles send us the Invitation or Follow us:
To calculate the Datafile Growth on a yearly basis:
select to_char(CREATION_TIME,’RRRR’) year,to_char(CREATION_TIME,’MM’) month,round(sum(bytes)/1024/1024/1024) gb
from v$datafile group by to_char(CREATION_TIME,’RRRR’),to_char(CREATION_TIME,’MM’) order by 1,2;
Through OEM :
Here are the steps to know the Database growth pattern for the last month/year using OEM
1) log in to OEM and Click on the Reports Tab
2) Navigate to Reports–>Storage–>Oracle Database Space Usage path and Click on the Oracle Database Space Usage link.
3) Select the Target database and here we are getting Oracle Database space usage for the last month.
4) Also we can get one year of Database growth by setting Set Time Period Button.
5) Also we can find Oracle Database Tablespace Monthly Space Usage by Navigating Reports–>Storage–>Oracle Database Space Usage path and clicking on the Oracle Database Tablespace Monthly Space Usage link.
Thank you for giving your valuable time to read the above information.
If you want to be updated with all our articles send us the Invitation or Follow us:
1. How to Determine Which Manager Ran a Specific Concurrent Request?
col USER_CONCURRENT_QUEUE_NAME for a100
select b.USER_CONCURRENT_QUEUE_NAME from fnd_concurrent_processes a,
fnd_concurrent_queues_vl b, fnd_concurrent_requests c
where a.CONCURRENT_QUEUE_ID = b.CONCURRENT_QUEUE_ID
and a.CONCURRENT_PROCESS_ID = c.controlling_manager
and c.request_id = '&conc_reqid';
2. Concurrent manager status for a given sid?
col MODULE for a20
col OSUSER for a10
col USERNAME for a10
set num 10
col MACHINE for a20
set lines 200
col SCHEMANAME for a10
select s.sid,s.serial#,p.spid os_pid,s.status, s.osuser,s.username, s.MACHINE,s.MODULE,
s.SCHEMANAME,
s.action from gv$session s, gv$process p WHERE s.paddr = p.addr and s.sid = '&oracle_sid';
3. Find out request-id from Oracle_Process Id:
select REQUEST_ID,ORACLE_PROCESS_ID,OS_PROCESS_Id from apps.fnd_concurrent_requests where
ORACLE_PROCESS_ID='&a';
4. To find sid, serial# for a given concurrent request id?
set lines 200
SELECT a.request_id, d.sid, d.serial# ,d.osuser,d.process , c.SPID ,d.inst_id
FROM apps.fnd_concurrent_requests a,
apps.fnd_concurrent_processes b,
gv$process c,
gv$session d
WHERE a.controlling_manager = b.concurrent_process_id
AND c.pid = b.oracle_process_id
AND b.session_id=d.audsid
AND a.request_id = &Request_ID
AND a.phase_code = 'R';
5. To find the concurrent program name, phase code, and status code for a given request id?
6. To find the SQL query for a given concurrent request sid?
select sid,sql_text from gv$session ses, gv$sqlarea sql where
ses.sql_hash_value = sql.hash_value(+) and ses.sql_address = sql.address(+) and
ses.sid='&oracle_sid'
/
7. To find child requests
set lines 200
col USER_CONCURRENT_PROGRAM_NAME for a40
col PHASE_CODE for a10
col STATUS_CODE for a10
col COMPLETION_TEXT for a20
SELECT sum.request_id,req.PARENT_REQUEST_ID,sum.user_concurrent_program_name, DECODE
(sum.phase_code,'C','Completed',sum.phase_code) phase_code, DECODE(sum.status_code,'D',
'Cancelled' ,
'E', 'Error' , 'G', 'Warning', 'H','On Hold' , 'T', 'Terminating', 'M', 'No Manager' , 'X',
'Terminated', 'C', 'Normal', sum.status_code) status_code, sum.actual_start_date,
sum.actual_completion_date, sum.completion_text FROM apps.fnd_conc_req_summary_v sum,
apps.fnd_concurrent_requests req where req.request_id=sum.request_id and req.PARENT_REQUEST_ID =
'&parent_concurrent_request_id';
8. Cancelling Concurrent requests:
update fnd_concurrent_requests
set status_code='D', phase_code='C'
where request_id=&req_id;
9. Kill sessions program-wise
select 'ALTER SYSTEM KILL SESSION '''||sid||','||serial#||''' immediate;' from v$session where
MODULE like '';
10 . Concurrent Request running by SID
SELECT a.request_id,
d.sid as Oracle_SID,
d.serial#,
d.osuser,
d.process,
c.SPID as OS_Process_ID
FROM apps.fnd_concurrent_requests a,
apps.fnd_concurrent_processes b,
gv$process c,
gv$session d
WHERE a.controlling_manager = b.concurrent_process_id
AND c.pid = b.oracle_process_id
AND b.session_id=d.audsid
AND d.sid = &SID;
11. Find out request-id from Oracle_Process Id:
select REQUEST_ID,ORACLE_PROCESS_ID,OS_PROCESS_Id from fnd_concurrent_requests where
ORACLE_PROCESS_ID='&a';
12. Oracle Concurrent Request Error Script (requests which were errored out)
SELECT a.request_id "Req Id"
,a.phase_code,a.status_code
, actual_start_date
, actual_completion_date
,c.concurrent_program_name || ': ' || ctl.user_concurrent_program_name "program"
FROM APPLSYS.fnd_Concurrent_requests a,APPLSYS.fnd_concurrent_processes b
,applsys.fnd_concurrent_queues q
,APPLSYS.fnd_concurrent_programs c
,APPLSYS.fnd_concurrent_programs_tl ctl
WHERE a.controlling_manager = b.concurrent_process_id
AND a.concurrent_program_id = c.concurrent_program_id
AND a.program_application_id = c.application_id
AND a.status_code = 'E'
AND a.phase_code = 'C'
AND actual_start_date > sysdate - 2
AND b.queue_application_id = q.application_id
AND b.concurrent_queue_id = q.concurrent_queue_id
AND ctl.concurrent_program_id = c.concurrent_program_id
AND ctl.LANGUAGE = 'US'
ORDER BY 5 DESC;
13. Request submitted by User
SELECT
user_concurrent_program_name,
request_date,
request_id,
phase_code,
status_code
FROM
fnd_concurrent_requests fcr,
fnd_concurrent_programs_tl fcp,
fnd_responsibility_tl fr,
fnd_user fu
WHERE
fcr.CONCURRENT_PROGRAM_ID = fcp.concurrent_program_id
and fcr.responsibility_id = fr.responsibility_id
and fcr.requested_by = fu.user_id
and user_name = '&user'
AND actual_start_date > sysdate - 1
ORDER BY REQUEST_DATE Asc;
14. Concurrent Program enables trace
col User_Program_Name for a40
col Last_Updated_By for a30
col DESCRIPTION for a30
SELECT A.CONCURRENT_PROGRAM_NAME "Program_Name",
SUBSTR(A.USER_CONCURRENT_PROGRAM_NAME,1,40) "User_Program_Name",
SUBSTR(B.USER_NAME,1,15) "Last_Updated_By",
SUBSTR(B.DESCRIPTION,1,25) DESCRIPTION
FROM APPS.FND_CONCURRENT_PROGRAMS_VL A, APPLSYS.FND_USER B
WHERE A.ENABLE_TRACE='Y'
AND A.LAST_UPDATED_BY=B.USER_ID;
Thank you for giving your valuable time to read the above information.
If you want to be updated with all our articles send us the Invitation or Follow us:
RMAN-00571: =========================================================== RMAN-00569: =============== ERROR MESSAGE STACK FOLLOWS =============== RMAN-00571: =========================================================== RMAN-03002: failure of backup plus archivelog command at 07/12/2021 03:29:07 RMAN-06183: datafile or datafile copy +ORA_DATA/wwibetest_bosqeumcsdb/datafile/undotbs1.779.1077535587 (file number 3) larger than MAXSETSIZE
Finding and solution:
RMAN> show all;
using target database control file instead of recovery catalog
RMAN configuration parameters for database with db_unique_name WWIBEMCS_BOSQEUMCSDB201 are:
CONFIGURE RETENTION POLICY TO REDUNDANCY 1;
CONFIGURE BACKUP OPTIMIZATION ON;
CONFIGURE DEFAULT DEVICE TYPE TO DISK;
CONFIGURE CONTROLFILE AUTOBACKUP ON;
CONFIGURE CONTROLFILE AUTOBACKUP FORMAT FOR DEVICE TYPE DISK TO ‘/backup/oracle/WWIBEMCS/rman/WWIBEMCS_autobcf_%F’;
CONFIGURE DEVICE TYPE DISK PARALLELISM 4 BACKUP TYPE TO BACKUPSET;
CONFIGURE DATAFILE BACKUP COPIES FOR DEVICE TYPE DISK TO 1;
CONFIGURE ARCHIVELOG BACKUP COPIES FOR DEVICE TYPE DISK TO 1;
CONFIGURE CHANNEL DEVICE TYPE DISK FORMAT ‘/bck/oracle/%d/rman/%d_%Y%M%D_%u_s%s_p%p’;
CONFIGURE MAXSETSIZE TO 30 G;
CONFIGURE ENCRYPTION FOR DATABASE OFF; # default
CONFIGURE ENCRYPTION ALGORITHM ‘AES128’; # default
CONFIGURE COMPRESSION ALGORITHM ‘BASIC’ AS OF RELEASE ‘DEFAULT’ OPTIMIZE FOR LOAD TRUE ; # default
CONFIGURE ARCHIVELOG DELETION POLICY TO NONE;
CONFIGURE SNAPSHOT CONTROLFILE NAME TO ‘/wwi/wwdb/db/oracle/product/11.2.0.4/db_1/dbs/snapcf_WWIBEMCS.f’; # default
RMAN> CONFIGURE MAXSETSIZE TO 35 G;
old RMAN configuration parameters:
CONFIGURE MAXSETSIZE TO 30 G;
new RMAN configuration parameters:
CONFIGURE MAXSETSIZE TO 35 G;
new RMAN configuration parameters are successfully stored
RMAN> show all;
RMAN configuration parameters for database with db_unique_name WWIBEMCS_BOSQEUMCSDB201 are:
CONFIGURE RETENTION POLICY TO REDUNDANCY 1;
CONFIGURE BACKUP OPTIMIZATION ON;
CONFIGURE DEFAULT DEVICE TYPE TO DISK;
CONFIGURE CONTROLFILE AUTOBACKUP ON;
CONFIGURE CONTROLFILE AUTOBACKUP FORMAT FOR DEVICE TYPE DISK TO ‘/backup/oracle/WWIBEMCS/rman/WWIBEMCS_autobcf_%F’;
CONFIGURE DEVICE TYPE DISK PARALLELISM 4 BACKUP TYPE TO BACKUPSET;
CONFIGURE DATAFILE BACKUP COPIES FOR DEVICE TYPE DISK TO 1;
CONFIGURE ARCHIVELOG BACKUP COPIES FOR DEVICE TYPE DISK TO 1;
CONFIGURE CHANNEL DEVICE TYPE DISK FORMAT ‘/bck/oracle/%d/rman/%d_%Y%M%D_%u_s%s_p%p’;
CONFIGURE MAXSETSIZE TO 35 G;
Now I ran the RMAN backup it went successful.
Thank you for giving your valuable time to read the above information.
If you want to be updated with all our articles send us the Invitation or Follow us:
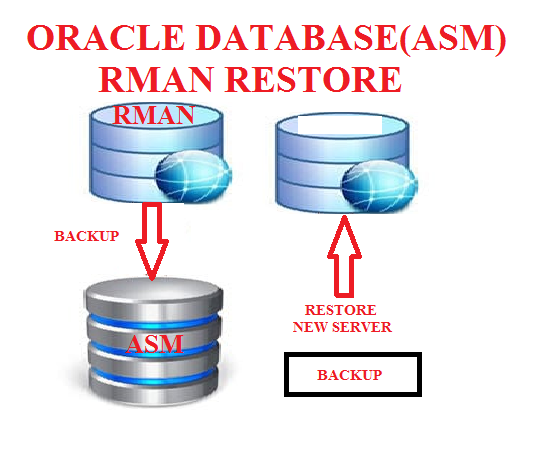
Description:
In this blog, we are going to see take RMAN backup in asm storage and restore the database to another server.
RMAN Restore ASM:
Take the backup using RMAN in source host copy the backup into destination host, using that backup files to restore the database.
Overall Steps:
Source server:
1. Backup Database using RMAN
2. Create pfile from spfile
3. Copy the backup files to the destination server
Destination server:
1. Edit pfile
2. Create Required Folders in destination server
3. Add the database entry in oratab
4. Startup using pfile Nomount stage
5. Restore control file
6. Mount database
7. Catalog backup pieces
8. Restore and recover the database
9. Change dbname/DBID uisng NID
10. verify the database name and id.
Source Server:
Step 1: Take backup using RMAN:
Create backup directory:
Backup script:
run {
allocate channel t1 type disk;
allocate channel t1 type disk;
allocate channel t1 type disk;
backup incremental level 0 database format ‘/u01/share/backup/database_%d_%u_%s’;
release channel t1;
}
sql ‘alter system archive log current’;
run {
allocate channel a1 type disk;
backup archivelog all format ‘/u01/share/backup/arch_%d_%u_%s’;
release channel a1;
}
run {
allocate channel c1 type disk;
backup current controlfile format ‘/u01/share/backup/Control_%d_%u_%s’;
release channel c1;
}
exit
Connect RMAN and execute the script:
[oracle@asm ~]$ rman target /
Recovery Manager: Release 19.0.0.0.0 – Production on Fri Jan 21 08:01:54 2022
Version 19.3.0.0.0
Copyright (c) 1982, 2019, Oracle and/or its affiliates. All rights reserved.
connected to target database: ORAASM (DBID=1977555372)
RMAN> @backup.rcv
RMAN> run {
2> allocate channel t1 type disk;
3> allocate channel t2 type disk;
4> allocate channel t3 type disk;
5> backup incremental level 0 database format ‘/u01/share/backup/database_%d_%u_%s’;
6> release channel t1;
7> release channel t2;
8> release channel t3;
9> }
using target database control file instead of recovery catalog
allocated channel: t1
channel t1: SID=78 device type=DISK
allocated channel: t3
channel t3: SID=88 device type=DISK
Starting backup at 21-JAN-22
channel t1: starting incremental level 0 datafile backup set
channel t1: specifying datafile(s) in backup set
input datafile file number=00001 name=+DATA/ORAASM/DATAFILE/system.257.1092813819
channel t1: starting piece 1 at 21-JAN-22
channel t2: starting incremental level 0 datafile backup set
channel t2: specifying datafile(s) in backup set
input datafile file number=00003 name=+DATA/ORAASM/DATAFILE/sysaux.258.1092813853
input datafile file number=00014 name=+DATA/ORAASM/DATAFILE/tblspace.281.1093044531
input datafile file number=00007 name=+DATA/ORAASM/DATAFILE/users.260.1092813869
channel t2: starting piece 1 at 21-JAN-22
channel t3: starting incremental level 0 datafile backup set
channel t3: specifying datafile(s) in backup set
input datafile file number=00004 name=+DATA/ORAASM/DATAFILE/undotbs1.259.1092813869
input datafile file number=00015 name=+DATA/ORAASM/DATAFILE/test.282.1094538795
input datafile file number=00013 name=+DATA/ORAASM/DATAFILE/tblspace.280.1093044407
channel t3: starting piece 1 at 21-JAN-22
channel t3: finished piece 1 at 21-JAN-22
piece handle=/u01/share/backup/database_ORAASM_080jqqo1_8 tag=TAG20220121T080204 comment=NONE
channel t3: backup set complete, elapsed time: 00:00:16
channel t3: starting incremental level 0 datafile backup set
channel t3: specifying datafile(s) in backup set
input datafile file number=00010 name=+DATA/ORAASM/D47CEAB72C2F2513E053867EA8C0538D/DATAFILE/sysaux.277.1092815375
input datafile file number=00011 name=+DATA/ORAASM/D47CEAB72C2F2513E053867EA8C0538D/DATAFILE/undotbs1.275.1092815375
channel t3: starting piece 1 at 21-JAN-22
channel t1: finished piece 1 at 21-JAN-22
piece handle=/u01/share/backup/database_ORAASM_060jqqns_6 tag=TAG20220121T080204 comment=NONE
channel t1: backup set complete, elapsed time: 00:01:10
channel t1: starting incremental level 0 datafile backup set
channel t1: specifying datafile(s) in backup set
input datafile file number=00006 name=+DATA/ORAASM/86B637B62FE07A65E053F706E80A27CA/DATAFILE/sysaux.271.1092814421
channel t1: starting piece 1 at 21-JAN-22
channel t2: finished piece 1 at 21-JAN-22
piece handle=/u01/share/backup/database_ORAASM_070jqqns_7 tag=TAG20220121T080204 comment=NONE
channel t2: backup set complete, elapsed time: 00:01:13
channel t2: starting incremental level 0 datafile backup set
channel t2: specifying datafile(s) in backup set
input datafile file number=00009 name=+DATA/ORAASM/D47CEAB72C2F2513E053867EA8C0538D/DATAFILE/system.276.1092815375
input datafile file number=00012 name=+DATA/ORAASM/D47CEAB72C2F2513E053867EA8C0538D/DATAFILE/users.279.1092815459
channel t2: starting piece 1 at 21-JAN-22
channel t3: finished piece 1 at 21-JAN-22
piece handle=/u01/share/backup/database_ORAASM_090jqqop_9 tag=TAG20220121T080204 comment=NONE
channel t3: backup set complete, elapsed time: 00:00:49
channel t3: starting incremental level 0 datafile backup set
channel t3: specifying datafile(s) in backup set
input datafile file number=00005 name=+DATA/ORAASM/86B637B62FE07A65E053F706E80A27CA/DATAFILE/system.270.1092814419
channel t3: starting piece 1 at 21-JAN-22
channel t1: finished piece 1 at 21-JAN-22
piece handle=/u01/share/backup/database_ORAASM_0a0jqqq2_10 tag=TAG20220121T080204 comment=NONE
channel t1: backup set complete, elapsed time: 00:00:12
channel t1: starting incremental level 0 datafile backup set
channel t1: specifying datafile(s) in backup set
input datafile file number=00008 name=+DATA/ORAASM/86B637B62FE07A65E053F706E80A27CA/DATAFILE/undotbs1.272.1092814421
channel t1: starting piece 1 at 21-JAN-22
channel t1: finished piece 1 at 21-JAN-22
piece handle=/u01/share/backup/database_ORAASM_0d0jqqqg_13 tag=TAG20220121T080204 comment=NONE
channel t1: backup set complete, elapsed time: 00:00:26
channel t2: finished piece 1 at 21-JAN-22
piece handle=/u01/share/backup/database_ORAASM_0b0jqqq9_11 tag=TAG20220121T080204 comment=NONE
channel t2: backup set complete, elapsed time: 00:00:27
channel t3: finished piece 1 at 21-JAN-22
piece handle=/u01/share/backup/database_ORAASM_0c0jqqqf_12 tag=TAG20220121T080204 comment=NONE
channel t3: backup set complete, elapsed time: 00:00:26
Finished backup at 21-JAN-22
Starting Control File and SPFILE Autobackup at 21-JAN-22
piece handle=+DATA/ORAASM/AUTOBACKUP/2022_01_21/s_1094544235.283.1094544237 comment=NONE
Finished Control File and SPFILE Autobackup at 21-JAN-22
released channel: t1
released channel: t2
released channel: t3
RMAN> sql ‘alter system archive log current’;
sql statement: alter system archive log current
RMAN> run {
2> allocate channel a1 type disk;
3> backup archivelog all format ‘/u01/share/backup/arch_%d_%u_%s’;
4> release channel a1;
5> }
allocated channel: a1
channel a1: SID=78 device type=DISK
Starting backup at 21-JAN-22
current log archived
channel a1: starting archived log backup set
channel a1: specifying archived log(s) in backup set
input archived log thread=1 sequence=16 RECID=1 STAMP=1094544242
input archived log thread=1 sequence=17 RECID=2 STAMP=1094544243
channel a1: starting piece 1 at 21-JAN-22
channel a1: finished piece 1 at 21-JAN-22
piece handle=/u01/share/backup/arch_ORAASM_0f0jqqrk_15 tag=TAG20220121T080403 comment=NONE
channel a1: backup set complete, elapsed time: 00:00:03
Finished backup at 21-JAN-22
Starting Control File and SPFILE Autobackup at 21-JAN-22
piece handle=+DATA/ORAASM/AUTOBACKUP/2022_01_21/s_1094544247.289.1094544249 comment=NONE
Finished Control File and SPFILE Autobackup at 21-JAN-22
released channel: a1
RMAN> run {
2> allocate channel c1 type disk;
3> backup current controlfile format ‘/u01/share/backup/Control_%d_%u_%s’;
4> release channel c1;
5> }
allocated channel: c1
channel c1: SID=78 device type=DISK
Starting backup at 21-JAN-22
channel c1: starting full datafile backup set
channel c1: specifying datafile(s) in backup set
including current control file in backup set
channel c1: starting piece 1 at 21-JAN-22
channel c1: finished piece 1 at 21-JAN-22
piece handle=/u01/share/backup/Control_ORAASM_0h0jqqrs_17 tag=TAG20220121T080412 comment=NONE
channel c1: backup set complete, elapsed time: 00:00:01
Finished backup at 21-JAN-22
Starting Control File and SPFILE Autobackup at 21-JAN-22
piece handle=+DATA/ORAASM/AUTOBACKUP/2022_01_21/s_1094544256.290.1094544257 comment=NONE
Finished Control File and SPFILE Autobackup at 21-JAN-22
released channel: c1
RMAN> exit
Recovery Manager complete.
Check the backup file location:
Step 2: Create pfile from spfile
create pfile=’/home/oracle/initasmora.ora’ from spfile; Step 3: Copy the backup file into destination server
run
{
ALLOCATE CHANNEL d1 DEVICE TYPE disk;
ALLOCATE CHANNEL d2 DEVICE TYPE disk;
set newname for datafile 1 to ‘+DATA’;
set newname for datafile 2 to ‘+DATA’;
set newname for datafile 3 to ‘+DATA’;
set newname for datafile 4 to ‘+DATA’;
set newname for datafile 5 to ‘+DATA’;
SQL “ALTER DATABASE RENAME FILE ”+DATA/oraasm/onlinelog/group_3.268.1092813965”
to ”+DATA”” ;
SQL “ALTER DATABASE RENAME FILE ”+DATA/oraasm/onlinelog/group_2.266.1092813951”
to ”+DATA”” ;
SQL “ALTER DATABASE RENAME FILE ”+DATA/oraasm/onlinelog/group_1.265.1092813949”
to ”+DATA”” ;
SET UNTIL SEQUENCE 12; <— 11+1
RESTORE DATABASE;
SWITCH DATAFILE ALL;
RECOVER DATABASE;
}
SQL> startup nomount pfile='initasmora.ora';
ORACLE instance started.

Total System Global Area 1269366784 bytes
Fixed Size                  2227984 bytes
Variable Size             838861040 bytes
Database Buffers          419430400 bytes
Redo Buffers                8847360 bytes
SQL> alter database mount;

Database altered.

SQL>

set db name and id:
[oracle@asm asmora]$ . oraenv
ORACLE_SID = [asmora] ?
The Oracle base remains unchanged with value /u01/app/oracle
[oracle@asm asmora]$ nid target=sys dbname=asmora
DBNEWID: Release 19.0.0.0.0 – Production on Fri Jan 21 09:09:50 2022
Copyright (c) 1982, 2019, Oracle and/or its affiliates. All rights reserved.
Password:
Connected to database ORAASM (DBID=1977555372)
Connected to server version 19.3.0
Control Files in database:
+DATA/ASMORA/CONTROLFILE/current.262.1092813933
+DATA/ASMORA/CONTROLFILE/current.261.1092813933
Change database ID and database name ORAASM to ASMORA? (Y/[N]) => y
Proceeding with operation
Changing database ID from 1977555372 to 65466533
Changing database name from ORAASM to ASMORA
Control File +DATA/ASMORA/CONTROLFILE/current.262.1092813933 – modified
Control File +DATA/ASMORA/CONTROLFILE/current.261.1092813933 – modified
Datafile +DATA/ORAASM/DATAFILE/system.257.109281381 – dbid changed, wrote new name
Datafile +DATA/ORAASM/DATAFILE/sysaux.258.109281385 – dbid changed, wrote new name
Datafile +DATA/ORAASM/DATAFILE/undotbs1.259.109281386 – dbid changed, wrote new name
Datafile +DATA/ORAASM/86B637B62FE07A65E053F706E80A27CA/DATAFILE/system.270.109281441 – dbid changed, wrote new name
Datafile +DATA/ORAASM/86B637B62FE07A65E053F706E80A27CA/DATAFILE/sysaux.271.109281442 – dbid changed, wrote new name
Datafile +DATA/ORAASM/DATAFILE/users.260.109281386 – dbid changed, wrote new name
Datafile +DATA/ORAASM/86B637B62FE07A65E053F706E80A27CA/DATAFILE/undotbs1.272.109281442 – dbid changed, wrote new name
Datafile +DATA/ORAASM/D47CEAB72C2F2513E053867EA8C0538D/DATAFILE/system.276.109281537 – dbid changed, wrote new name
Datafile +DATA/ORAASM/D47CEAB72C2F2513E053867EA8C0538D/DATAFILE/sysaux.277.109281537 – dbid changed, wrote new name
Datafile +DATA/ORAASM/D47CEAB72C2F2513E053867EA8C0538D/DATAFILE/undotbs1.275.109281537 – dbid changed, wrote new name
Datafile +DATA/ORAASM/D47CEAB72C2F2513E053867EA8C0538D/DATAFILE/users.279.109281545 – dbid changed, wrote new name
Datafile +DATA/ORAASM/DATAFILE/tblspace.280.109304440 – dbid changed, wrote new name
Datafile +DATA/ORAASM/DATAFILE/tblspace.281.109304453 – dbid changed, wrote new name
Datafile +DATA/ORAASM/DATAFILE/test.282.109453879 – dbid changed, wrote new name
Datafile +DATA/ORAASM/TEMPFILE/temp.269.109281404 – dbid changed, wrote new name
Datafile +DATA/ORAASM/D47CB418C2B91B66E053867EA8C0C5A0/TEMPFILE/temp.273.109281445 – dbid changed, wrote new name
Datafile +DATA/ORAASM/D47CEAB72C2F2513E053867EA8C0538D/TEMPFILE/temp.278.109281541 – dbid changed, wrote new name
Control File +DATA/ASMORA/CONTROLFILE/current.262.1092813933 – dbid changed, wrote new name
Control File +DATA/ASMORA/CONTROLFILE/current.261.1092813933 – dbid changed, wrote new name
Instance shut down
Database name changed to ASMORA.
Modify parameter file and generate a new password file before restarting.
Database ID for database ASMORA changed to 65466533.
All previous backups and archived redo logs for this database are unusable.
Database is not aware of previous backups and archived logs in Recovery Area.
Database has been shutdown, open database with RESETLOGS option.
Succesfully changed database name and ID.
DBNEWID – Completed succesfully.
[oracle@asm asmora]$
Step 10: check the DB name and id
SQL> alter database open resetlogs;
Database altered.
SQL> select name, open_mode, db_unique_name, dbid from v$database;
NAME OPEN_MODE DB_UNIQUE_NAME DBID
ASMORA READ WRITE asmora 65466533
Thank you for giving your valuable time to read the above information.
If you want to be updated with all our articles send us the Invitation or Follow us:
1. Check the status of Notifications: ====================================
col RECIPIENT_ROLE format a20
col FROM_USER format a20
col TO_USER format a20
set lines 170
select NOTIFICATION_ID,MESSAGE_TYPE,MESSAGE_NAME,RECIPIENT_ROLE,STATUS,FROM_USER,TO_USER from wf_notifications where NOTIFICATION_ID=‘&1′;
2.Check the status of Workflow components: =========================================
SELECT component_name as Component, component_status as Status FROM fnd_svc_components
3. To check whether notification is present: =========================================
select recipient_role,notification_id,status,mail_status from wf_notifications where recipient_role like ‘&user_name’;
The e-mail notification is sent only if all of the following is true.
Notification status is OPEN or CANCELED
Notification mail_status is MAIL or INVALID
4. Check Recipient role has a valid e-mail address and notification preference MAIL% =========================================
SELECT email_address, nvl(WF_PREF.get_pref(name, ‘MAILTYPE’), notification_preference)
FROM wf_roles
WHERE name = ‘&recipient_role’;
Recipient can receive email notification only if
notification preference is not set ‘QUERY’ / ‘DISABLED’ / ‘SUMMARY’ / ‘SUMHTML’ &
recipient has valid email address
5.WF_DEFERRED Queue volume: ===========================
col corrid format a60
set lines 130
set pages 100
select NVL(substr(wfe.corrid,1,50),’NULL – No Value’) corrid, decode(wfe.state,0,’0 = Ready’,1,’1 = Delayed’,2,’2 = Retained’,
3,’3 = Exception’,to_char(substr(wfe.state,1,12))) State,count(*) COUNT
from applsys.wf_deferred wfe group by wfe.corrid, wfe.state;
6.WF_NOTIFICATION_OUT Queue volume: ===================================
col corrid format a60
set lines 130
set pages 100
select NVL(substr(wfe.corrid,1,50),’NULL – No Value’) corrid, decode(wfe.state,0,’0 = Ready’,1,’1 = Delayed’,2,’2 = Retained’,
3,’3 = Exception’,to_char(substr(wfe.state,1,12))) State,count(*)COUNT
from applsys.wf_notification_out wfe group by wfe.corrid, wfe.state;
Output Post Processor (OPP) in Oracle Applications R12 and 11i
OPP runs as a service that can be managed through Oracle Applications Manager (OAM) from the System Activity page (Navigation: Applications Dashboard > Applications
Service (from the dropdown list) > Go).
How to Increase the number of Output Post Processors?
1.Log on to Applications with “System Administrator” responsibility.
2.Navigate to Concurrent -> Manager -> Define.
3. Query for the “Output Post Processor” service.
4. Click on “Work Shifts” and increase the number of processes
How to get OPP manager log file location?
$APPLCSF/log/<SID>/FNDOPP####.txt OR
1,System Administrator > Concurrent > Manager > Administer
2,Search for ‘Output Post Processor’
3,Click the ‘Processes’ button .
4, Click the Manager Log button. This will open the ‘OPP’
Upload the OPP log file.
In some cases, Output Post Processor is not starting up and it shows Actual and Target are showing different values when we query for Output Post Processor.
The log files show no error message. In this case, apply the following possible solution for starting the OPP.
1. Shut down the internal manager by using adcmctl.sh stop apps/apps
2. Make sure there are no FNDLIBR processes running:
$ ps -ef| grep FNDLIBR OR ps -ef|grep applprod|grep FNDLIBR
3. If there is any FNDLIBR process please kill it $ kill -9 pid
4. Run cmclean.sql script
5. Restart the internal manager by using adcmctl.sh start apps/apps
or How to kill and start Output Post Processor (OPP) Background:
This article explains how to kill OPP and restart the same
Solution:
1,System Administator > Concurrent > Manager > Administer
2,Query “Output Post Processor” -> Processes button
Get the sytem id of “Output Post Processor”
3,ps -ef|grep [system id]
4,kill -9 [system id] in Unix
5,System Administator > Concurrent > Manager > Administer
6,Query “Output Post Processor” -> Restart button
Thank you for giving your valuable time to read the above information.
If you want to be updated with all our articles send us the Invitation or Follow us:
[applmgr@document appl]$ FNDCPASS apps/apps 0 Y system/ manager SYSTEM APPLSYS <new apps passwd>
FNDCPASS apps/apps 0 Y system/manager SYSTEM APPLSYS newpasswd
Start AdminServer using the $INST_TOP/admin/scripts/adadminsrvctl.sh
Note:Don’t start any other application tier services.
Change the “apps” password in WLS Datasource as follows:
Log in to WLS Administration Console. http://document.subnet.vcn.oraclevcn.com:8000/OA_HTML/AppsLogin
Click Lock & Edit in Change Center.
In the Domain Structure tree, expand Services, then select Data Sources.
On the “Summary of JDBC Data Sources” page, select EBSDataSource
On the “Settings for EBSDataSource” page, select the Connection Pool tab.
Enter the new password in the “Password” field.
Enter the new password in the “Confirm Password” field.
Click Save.
Check whether you are able to connect to DB using apps
sqlplus apps/<newpassword> from application tier.
Before Starting all the services. Run Autoconfig.
cd $ADMIN_SCRIPTS_HOME
sh adautocfg.sh
Now start the services.
Start all the application tier services using the
$INST_TOP/admin/scripts/adstrtal.sh script.
How to change the SYSADMIN password
[applmgr@document appl]$ FNDCPASS apps/*** 0 Y system/manager USER SYSADMIN new_password
What is Apps Schema?
Apps are a schema that does not contain any tables of itself. We can say APPS is the shared runtime schema for all E-Business Suite products. It contains all the synonyms of all the tables in Oracle apps. But it also contains packages, functions, procedures. The default password is apps.
What is Applsys Schema?
Applsys schema contains all the tables required for administrative purposes. The default password is apps. All the technical products’ database objects are consolidated into a single schema called Applsys
What is Applsyspub schema?
Applsyspub schema is responsible for password checking. The default password is pub.Applsyspub is used for authentication by having read-only views.
Why should Apps & Applsys passwords always be the same?
The need to have the same password for Apps and Applsys is because when you sign on to apps, initially it connects to a public schema called APPLSYSPUB. This validates the AOL username and password that we enter (operations/welcome using a guest user account. Once this is verified we select responsibility, this is validated by APPLSYS schema and then it connects to APPS schema.
Thank you for giving your valuable time to read the above information.
If you want to be updated with all our articles send us the Invitation or Follow us:
Generally in day to days usage of Oracle Apps R12, we came up with many issues which is resolved by bouncing Apache Server like:-
– JSP page not loading
– Changes are not appearing after done with personalization
– Some weird java error.
It is really easy to get this done.
[oraappl@apps-node-qa ~]$ . ./EBSapps.env Run
E-Business Suite Environment Information
RUN File System : /wwi/erp/apps/fs2/EBSapps/appl
PATCH File System : /wwi/erp/apps/fs1/EBSapps/appl
Non-Editioned File System : /wwi/erp/apps/fs_ne
Description: In this blog, we are going to see step by step process on the oracle data guard manual failover process.
Failover: A failover is a role transition in which one of the standby databases is transitioned to the primary role after the primary database fails or has become unreachable. A failover may or may not result in data loss depending on the protection mode in effect at the time of the failover.
Data Guard Configuration Details:- Overall Steps:-
1. Check the database role,open_mode in standby server.2. Cancel MRP process.3. Change Standby to Primary Database.4. Bounce the database.
Step 1:- Check the database role,open_mode in the standby server. SQL> select name,open_mode,database_role from v$database; NAME OPEN_MODE DATABASE_ROLE ——— ——————– —————- CLOUD MOUNTED PHYSICAL STANDBY
Cancel the MRP process: SQL> recover managed standby database cancel; Media recovery complete.
Finish the MRP process: SQL> alter database recover managed standby database finish; Database altered. Step 3:- Change Standby to Primary Database. SQL> alter database activate standby database; Database altered.
Check the role changed or not: SQL> select name,open_mode,database_role from v$database; NAME OPEN_MODE DATABASE_ROLE ——— ——————– —————- CLOUD MOUNTED PRIMARY Step 4:- Bounce the Database. SQL> shut immediate SQL> startup Check the database role and status. SQL> select name,open_mode,database_role from v$database; NAME OPEN_MODE DATABASE_ROLE ——— ——————– —————- CLOUD READ WRITE PRIMARY
Thank you for giving your valuable time to read the above information.
If you want to be updated with all our articles send us the Invitation or Follow us: