It is very important to have 64bit unixODBC libraries path (/usr/lib64/libodbc.so) in LD_LIBRARY_PATH because we run RHEL x64 and Oracle 64-bit software.
Step 6 –
Create init<sid>.ora. In my case, I will call this dg4odbc (initdg4odbc.ora). The content should be like below.
HS_DB_NAME = H1X
HS_FDS_CONNECT_INFO = H1X <===== This is the DSN name that comes from step 2 /etc/odbc.ini
The Oracle session has requested and is waiting for multiple contiguous database blocks (up to DB_FILE_MULTIBLOCK_READ_COUNT) to be read into the SGA from the disk.
Full Table scans
Fast Full Index Scans
ACTIONS:
Optimize multi-block I/O by setting the parameter DB_FILE_MULTIBLOCK_READ_COUNT
Partition pruning to reduce the number of blocks visited
Consider the usage of multiple buffers pools and caches of frequently used indexes/tables in the KEEP pool
Optimize the SQL statement that initiated most of the waits. The goal is to minimize the number of physical and logical reads.
Should the statement access the data by a full table scan or index FFS? Would an index range or unique scan be more efficient?
Does the query use the right driving table?
Are the SQL predicates appropriate for hash or merge join?
If full scans are appropriate, can parallel query improve the response time?
The objective is to reduce the demands for both the logical and
physical I/Os, and this is best achieved through SQL and application tuning.
Make sure all statistics are representative of the actual data. Check the LAST_ANALYZED date.
REMARKS:
If an application that has been running fine for a while suddenly clocks a lot of time on the DB file scattered read event and there hasn’t been a code change, you might want to check to see if one or more indexes have been dropped or become unusable.
DB file scattered read Reference Note# 34558.1
Thank you for giving your valuable time to read the above information.
If you want to be updated with all our articles send us the Invitation or Follow us:
Index reads performance can be affected by slow I/O subsystem and/or poor database files layout, which results in a higher average
wait time
Actions:
Check indexes on the table to ensure that the right index is being used
Check the column order of the index with the WHERE clause of the Top SQL statements
Rebuild indexes with a high clustering factor
Use partitioning to reduce the number of blocks being visited
Make sure optimizer statistics are up to date
Relocate ‘hot’ datafiles
Consider the usage of multiple buffers pools and cache frequently used indexes/tables in the KEEP pool
Inspect the execution plans of the SQL statements that access data
through indexes
Is it appropriate for the SQL statements to access data through
index lookups?
Is the application an online transaction processing (OLTP) or decision support system (DSS)?
Would full table scans be more efficient?
Do the statements use the right driving table?
The optimization goal is to minimize both the number of logical and physical I/Os.
Remarks:
The Oracle process wants a block that is currently not in the SGA, and it is waiting for the database block to be read into the SGA from the disk.
Significant DB file sequential read wait time is most likely an application issue.
If the DBA_INDEXES.CLUSTERING_FACTOR of the index approaches the number of blocks in the table, then most of the rows in the table are ordered. This is desirable.
However, if the clustering factor approaches the number of rows in the table, it means the rows in the table are randomly ordered and thus it requires more I/Os to complete the operation. You can improve the index’s clustering factor by rebuilding the table so that rows are ordered according to the index key and rebuilding the index thereafter.
The OPTIMIZER_INDEX_COST_ADJ and OPTIMIZER_INDEX_CACHING initialization parameters can influence the optimizer to favor the operation of the nested loop and choose an index access path over a full table scan.
Tuning I/O-related waits for Note id 223117.1
DB file sequential read Reference Note# 34559.1
Thank you for giving your valuable time to read the above information.
If you want to be updated with all our articles send us the Invitation or Follow us:
The following columns are returned in the below query:
Owner schema.
Object name and type (TABLE, INDEX, etc.).
Name of the table this object is associated with. For E.g. indexes are associated with their parent tables.
Database space is occupied by the object in megabytes.
Tablespace where an object is stored.
The number of extents allocated for the object.
Size of the initial extent in bytes.
Total database size occupied by the parent table. E.g. for indexes, it will be the size of the parent * table plus the sizes of all the indexes on that table.
SELECT * FROM (
SELECT
owner, object_name, object_type, table_name, ROUND(bytes)/1024/1024 AS MB,
tablespace_name, extents, initial_extent,
ROUND(Sum(bytes/1024/1024) OVER (PARTITION BY table_name)) AS total_table_MB
FROM (
SELECT owner, segment_name AS object_name, 'TABLE' AS object_type,
segment_name AS table_name, bytes,
tablespace_name, extents, initial_extent
FROM dba_segments
WHERE segment_type IN ('TABLE', 'TABLE PARTITION', 'TABLE SUBPARTITION')
UNION ALL
SELECT i.owner, i.index_name AS object_name, 'INDEX' AS object_type,
i.table_name, s.bytes,
s.tablespace_name, s.extents, s.initial_extent
FROM dba_indexes i, dba_segments s
WHERE s.segment_name = i.index_name
AND s.owner = i.owner
AND s.segment_type IN ('INDEX', 'INDEX PARTITION', 'INDEX SUBPARTITION')
UNION ALL
SELECT l.owner, l.column_name AS object_name, 'LOB_COLUMN' AS object_type,
l.table_name, s.bytes,
s.tablespace_name, s.extents, s.initial_extent
FROM dba_lobs l, dba_segments s
WHERE s.segment_name = l.segment_name
AND s.owner = l.owner
AND s.segment_type = 'LOBSEGMENT'
UNION ALL
SELECT l.owner, l.column_name AS object_name, 'LOB_INDEX' AS object_type,
l.table_name, s.bytes,
s.tablespace_name, s.extents, s.initial_extent
FROM dba_lobs l, dba_segments s
WHERE s.segment_name = l.index_name
AND s.owner = l.owner
AND s.segment_type = 'LOBINDEX'
)
WHERE owner in UPPER('&TABLE_NAME')
)
WHERE total_table_MB > 10
ORDER BY total_table_MB DESC, MB DESC
/
Thank you for giving your valuable time to read the above information.
If you want to be updated with all our articles send us the Invitation or Follow us:
Description:
In this blog, we are going to see data guard switch over by using data guard broker DGMGRL.
Data Guard Switchover:
A database can be in one of two mutually exclusive modes (primary or standby). These roles can be altered at runtime without loss of data or resetting of redo logs. A switchover is a role reversal between the primary database and one of its standby databases. A switchover guarantees no data loss.
This is typically done for planned maintenance of the primary system.
During a switchover, the primary database transitions to a standby role, and the standby database transitions to the primary role.
The transition occurs without having to re-enable either database.
Overall steps:
1. Connect the primary database with DGMGRL Data Guard broker.
2. Switch over primary to standby database.
3. Connect Standby database.
4. Switch over standby to primary.
Step 1: Connect the primary database with the DGMGRL Data Guard broker.
[oratest@oracle admin]$ dgmgrl sys/oracle@orclDGMGRL for Linux: Release 19.0.0.0.0 - Production on
Fri Nov 12 13:19:44 2021 Version 19.9.0.0.0Copyright (c) 1982, 2019, Oracle and/or its affiliates.
All rights reserved.Welcome to DGMGRL, type "help" for information.
Connected to "orcl"
Connected as SYSDBA.
Step 2: Switch over primary to the standby database.
DGMGRL> switchover to orcl_stby;Performing switchover NOW, please wait...Operation requires a connection to instance "orcl" on database
"orcl_stby"Connecting to instance "orcl"...Connected as SYSDBA.New primary database "orcl_stby" is opening...Operation requires start up of instance "orcl" on database "orcl"Starting instance "orcl"...ORACLE instance started.Database mounted.Switchover succeeded, new primary is "orcl_stby"DGMGRL>Let's switch back to the original primary. Connect to the
new primary (orcl_stby) and switchover to the new standby database (orcl).
Step 3: Connect the Standby database.
[oratest@oracle admin]$ dgmgrl sys/oracle@orcl_stbyDGMGRL for Linux: Release 19.0.0.0.0 - Production on
Fri Nov 12 13:31:56 2021Version 19.9.0.0.0Copyright (c) 1982, 2019, Oracle and/or its affiliates.
All rights reserved.
Welcome to DGMGRL, type "help" for information.Connected to "orcl_stby"
Connected as SYSDBA.
Step 4: Switch over standby to primary
DGMGRL> switchover to orcl ;Performing switchover NOW, please wait...Operation requires a connection to instance "orcl" on
database "orcl"Connecting to instance "orcl"...Connected as SYSDBA.New primary database "orcl" is opening...Operation requires start up of instance "orcl" on database
"orcl_stby"Starting instance "orcl"...ORACLE instance started.Database mounted.Switchover succeeded, new primary is "orcl"DGMGRL>
Thank you for giving your valuable time to read the above information.
If you want to be updated with all our articles send us the Invitation or Follow us:
RMAN-00571: =========================================================== RMAN-00569: =============== ERROR MESSAGE STACK FOLLOWS =============== RMAN-00571: =========================================================== RMAN-03002: failure of backup plus archivelog command at 07/12/2021 03:29:07 RMAN-06183: datafile or datafile copy +ORA_DATA/wwibetest_bosqeumcsdb/datafile/undotbs1.779.1077535587 (file number 3) larger than MAXSETSIZE
Finding and solution:
RMAN> show all;
using target database control file instead of recovery catalog
RMAN configuration parameters for database with db_unique_name WWIBEMCS_BOSQEUMCSDB201 are:
CONFIGURE RETENTION POLICY TO REDUNDANCY 1;
CONFIGURE BACKUP OPTIMIZATION ON;
CONFIGURE DEFAULT DEVICE TYPE TO DISK;
CONFIGURE CONTROLFILE AUTOBACKUP ON;
CONFIGURE CONTROLFILE AUTOBACKUP FORMAT FOR DEVICE TYPE DISK TO ‘/backup/oracle/WWIBEMCS/rman/WWIBEMCS_autobcf_%F’;
CONFIGURE DEVICE TYPE DISK PARALLELISM 4 BACKUP TYPE TO BACKUPSET;
CONFIGURE DATAFILE BACKUP COPIES FOR DEVICE TYPE DISK TO 1;
CONFIGURE ARCHIVELOG BACKUP COPIES FOR DEVICE TYPE DISK TO 1;
CONFIGURE CHANNEL DEVICE TYPE DISK FORMAT ‘/bck/oracle/%d/rman/%d_%Y%M%D_%u_s%s_p%p’;
CONFIGURE MAXSETSIZE TO 30 G;
CONFIGURE ENCRYPTION FOR DATABASE OFF; # default
CONFIGURE ENCRYPTION ALGORITHM ‘AES128’; # default
CONFIGURE COMPRESSION ALGORITHM ‘BASIC’ AS OF RELEASE ‘DEFAULT’ OPTIMIZE FOR LOAD TRUE ; # default
CONFIGURE ARCHIVELOG DELETION POLICY TO NONE;
CONFIGURE SNAPSHOT CONTROLFILE NAME TO ‘/wwi/wwdb/db/oracle/product/11.2.0.4/db_1/dbs/snapcf_WWIBEMCS.f’; # default
RMAN> CONFIGURE MAXSETSIZE TO 35 G;
old RMAN configuration parameters:
CONFIGURE MAXSETSIZE TO 30 G;
new RMAN configuration parameters:
CONFIGURE MAXSETSIZE TO 35 G;
new RMAN configuration parameters are successfully stored
RMAN> show all;
RMAN configuration parameters for database with db_unique_name WWIBEMCS_BOSQEUMCSDB201 are:
CONFIGURE RETENTION POLICY TO REDUNDANCY 1;
CONFIGURE BACKUP OPTIMIZATION ON;
CONFIGURE DEFAULT DEVICE TYPE TO DISK;
CONFIGURE CONTROLFILE AUTOBACKUP ON;
CONFIGURE CONTROLFILE AUTOBACKUP FORMAT FOR DEVICE TYPE DISK TO ‘/backup/oracle/WWIBEMCS/rman/WWIBEMCS_autobcf_%F’;
CONFIGURE DEVICE TYPE DISK PARALLELISM 4 BACKUP TYPE TO BACKUPSET;
CONFIGURE DATAFILE BACKUP COPIES FOR DEVICE TYPE DISK TO 1;
CONFIGURE ARCHIVELOG BACKUP COPIES FOR DEVICE TYPE DISK TO 1;
CONFIGURE CHANNEL DEVICE TYPE DISK FORMAT ‘/bck/oracle/%d/rman/%d_%Y%M%D_%u_s%s_p%p’;
CONFIGURE MAXSETSIZE TO 35 G;
Now I ran the RMAN backup it went successful.
Thank you for giving your valuable time to read the above information.
If you want to be updated with all our articles send us the Invitation or Follow us:
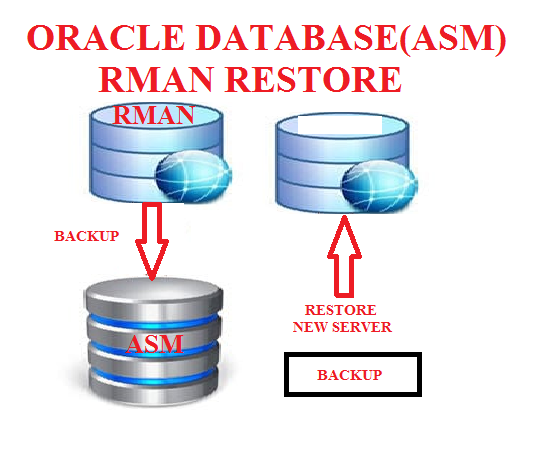
Description:
In this blog, we are going to see take RMAN backup in asm storage and restore the database to another server.
RMAN Restore ASM:
Take the backup using RMAN in source host copy the backup into destination host, using that backup files to restore the database.
Overall Steps:
Source server:
1. Backup Database using RMAN
2. Create pfile from spfile
3. Copy the backup files to the destination server
Destination server:
1. Edit pfile
2. Create Required Folders in destination server
3. Add the database entry in oratab
4. Startup using pfile Nomount stage
5. Restore control file
6. Mount database
7. Catalog backup pieces
8. Restore and recover the database
9. Change dbname/DBID uisng NID
10. verify the database name and id.
Source Server:
Step 1: Take backup using RMAN:
Create backup directory:
Backup script:
run {
allocate channel t1 type disk;
allocate channel t1 type disk;
allocate channel t1 type disk;
backup incremental level 0 database format ‘/u01/share/backup/database_%d_%u_%s’;
release channel t1;
}
sql ‘alter system archive log current’;
run {
allocate channel a1 type disk;
backup archivelog all format ‘/u01/share/backup/arch_%d_%u_%s’;
release channel a1;
}
run {
allocate channel c1 type disk;
backup current controlfile format ‘/u01/share/backup/Control_%d_%u_%s’;
release channel c1;
}
exit
Connect RMAN and execute the script:
[oracle@asm ~]$ rman target /
Recovery Manager: Release 19.0.0.0.0 – Production on Fri Jan 21 08:01:54 2022
Version 19.3.0.0.0
Copyright (c) 1982, 2019, Oracle and/or its affiliates. All rights reserved.
connected to target database: ORAASM (DBID=1977555372)
RMAN> @backup.rcv
RMAN> run {
2> allocate channel t1 type disk;
3> allocate channel t2 type disk;
4> allocate channel t3 type disk;
5> backup incremental level 0 database format ‘/u01/share/backup/database_%d_%u_%s’;
6> release channel t1;
7> release channel t2;
8> release channel t3;
9> }
using target database control file instead of recovery catalog
allocated channel: t1
channel t1: SID=78 device type=DISK
allocated channel: t3
channel t3: SID=88 device type=DISK
Starting backup at 21-JAN-22
channel t1: starting incremental level 0 datafile backup set
channel t1: specifying datafile(s) in backup set
input datafile file number=00001 name=+DATA/ORAASM/DATAFILE/system.257.1092813819
channel t1: starting piece 1 at 21-JAN-22
channel t2: starting incremental level 0 datafile backup set
channel t2: specifying datafile(s) in backup set
input datafile file number=00003 name=+DATA/ORAASM/DATAFILE/sysaux.258.1092813853
input datafile file number=00014 name=+DATA/ORAASM/DATAFILE/tblspace.281.1093044531
input datafile file number=00007 name=+DATA/ORAASM/DATAFILE/users.260.1092813869
channel t2: starting piece 1 at 21-JAN-22
channel t3: starting incremental level 0 datafile backup set
channel t3: specifying datafile(s) in backup set
input datafile file number=00004 name=+DATA/ORAASM/DATAFILE/undotbs1.259.1092813869
input datafile file number=00015 name=+DATA/ORAASM/DATAFILE/test.282.1094538795
input datafile file number=00013 name=+DATA/ORAASM/DATAFILE/tblspace.280.1093044407
channel t3: starting piece 1 at 21-JAN-22
channel t3: finished piece 1 at 21-JAN-22
piece handle=/u01/share/backup/database_ORAASM_080jqqo1_8 tag=TAG20220121T080204 comment=NONE
channel t3: backup set complete, elapsed time: 00:00:16
channel t3: starting incremental level 0 datafile backup set
channel t3: specifying datafile(s) in backup set
input datafile file number=00010 name=+DATA/ORAASM/D47CEAB72C2F2513E053867EA8C0538D/DATAFILE/sysaux.277.1092815375
input datafile file number=00011 name=+DATA/ORAASM/D47CEAB72C2F2513E053867EA8C0538D/DATAFILE/undotbs1.275.1092815375
channel t3: starting piece 1 at 21-JAN-22
channel t1: finished piece 1 at 21-JAN-22
piece handle=/u01/share/backup/database_ORAASM_060jqqns_6 tag=TAG20220121T080204 comment=NONE
channel t1: backup set complete, elapsed time: 00:01:10
channel t1: starting incremental level 0 datafile backup set
channel t1: specifying datafile(s) in backup set
input datafile file number=00006 name=+DATA/ORAASM/86B637B62FE07A65E053F706E80A27CA/DATAFILE/sysaux.271.1092814421
channel t1: starting piece 1 at 21-JAN-22
channel t2: finished piece 1 at 21-JAN-22
piece handle=/u01/share/backup/database_ORAASM_070jqqns_7 tag=TAG20220121T080204 comment=NONE
channel t2: backup set complete, elapsed time: 00:01:13
channel t2: starting incremental level 0 datafile backup set
channel t2: specifying datafile(s) in backup set
input datafile file number=00009 name=+DATA/ORAASM/D47CEAB72C2F2513E053867EA8C0538D/DATAFILE/system.276.1092815375
input datafile file number=00012 name=+DATA/ORAASM/D47CEAB72C2F2513E053867EA8C0538D/DATAFILE/users.279.1092815459
channel t2: starting piece 1 at 21-JAN-22
channel t3: finished piece 1 at 21-JAN-22
piece handle=/u01/share/backup/database_ORAASM_090jqqop_9 tag=TAG20220121T080204 comment=NONE
channel t3: backup set complete, elapsed time: 00:00:49
channel t3: starting incremental level 0 datafile backup set
channel t3: specifying datafile(s) in backup set
input datafile file number=00005 name=+DATA/ORAASM/86B637B62FE07A65E053F706E80A27CA/DATAFILE/system.270.1092814419
channel t3: starting piece 1 at 21-JAN-22
channel t1: finished piece 1 at 21-JAN-22
piece handle=/u01/share/backup/database_ORAASM_0a0jqqq2_10 tag=TAG20220121T080204 comment=NONE
channel t1: backup set complete, elapsed time: 00:00:12
channel t1: starting incremental level 0 datafile backup set
channel t1: specifying datafile(s) in backup set
input datafile file number=00008 name=+DATA/ORAASM/86B637B62FE07A65E053F706E80A27CA/DATAFILE/undotbs1.272.1092814421
channel t1: starting piece 1 at 21-JAN-22
channel t1: finished piece 1 at 21-JAN-22
piece handle=/u01/share/backup/database_ORAASM_0d0jqqqg_13 tag=TAG20220121T080204 comment=NONE
channel t1: backup set complete, elapsed time: 00:00:26
channel t2: finished piece 1 at 21-JAN-22
piece handle=/u01/share/backup/database_ORAASM_0b0jqqq9_11 tag=TAG20220121T080204 comment=NONE
channel t2: backup set complete, elapsed time: 00:00:27
channel t3: finished piece 1 at 21-JAN-22
piece handle=/u01/share/backup/database_ORAASM_0c0jqqqf_12 tag=TAG20220121T080204 comment=NONE
channel t3: backup set complete, elapsed time: 00:00:26
Finished backup at 21-JAN-22
Starting Control File and SPFILE Autobackup at 21-JAN-22
piece handle=+DATA/ORAASM/AUTOBACKUP/2022_01_21/s_1094544235.283.1094544237 comment=NONE
Finished Control File and SPFILE Autobackup at 21-JAN-22
released channel: t1
released channel: t2
released channel: t3
RMAN> sql ‘alter system archive log current’;
sql statement: alter system archive log current
RMAN> run {
2> allocate channel a1 type disk;
3> backup archivelog all format ‘/u01/share/backup/arch_%d_%u_%s’;
4> release channel a1;
5> }
allocated channel: a1
channel a1: SID=78 device type=DISK
Starting backup at 21-JAN-22
current log archived
channel a1: starting archived log backup set
channel a1: specifying archived log(s) in backup set
input archived log thread=1 sequence=16 RECID=1 STAMP=1094544242
input archived log thread=1 sequence=17 RECID=2 STAMP=1094544243
channel a1: starting piece 1 at 21-JAN-22
channel a1: finished piece 1 at 21-JAN-22
piece handle=/u01/share/backup/arch_ORAASM_0f0jqqrk_15 tag=TAG20220121T080403 comment=NONE
channel a1: backup set complete, elapsed time: 00:00:03
Finished backup at 21-JAN-22
Starting Control File and SPFILE Autobackup at 21-JAN-22
piece handle=+DATA/ORAASM/AUTOBACKUP/2022_01_21/s_1094544247.289.1094544249 comment=NONE
Finished Control File and SPFILE Autobackup at 21-JAN-22
released channel: a1
RMAN> run {
2> allocate channel c1 type disk;
3> backup current controlfile format ‘/u01/share/backup/Control_%d_%u_%s’;
4> release channel c1;
5> }
allocated channel: c1
channel c1: SID=78 device type=DISK
Starting backup at 21-JAN-22
channel c1: starting full datafile backup set
channel c1: specifying datafile(s) in backup set
including current control file in backup set
channel c1: starting piece 1 at 21-JAN-22
channel c1: finished piece 1 at 21-JAN-22
piece handle=/u01/share/backup/Control_ORAASM_0h0jqqrs_17 tag=TAG20220121T080412 comment=NONE
channel c1: backup set complete, elapsed time: 00:00:01
Finished backup at 21-JAN-22
Starting Control File and SPFILE Autobackup at 21-JAN-22
piece handle=+DATA/ORAASM/AUTOBACKUP/2022_01_21/s_1094544256.290.1094544257 comment=NONE
Finished Control File and SPFILE Autobackup at 21-JAN-22
released channel: c1
RMAN> exit
Recovery Manager complete.
Check the backup file location:
Step 2: Create pfile from spfile
create pfile=’/home/oracle/initasmora.ora’ from spfile; Step 3: Copy the backup file into destination server
run
{
ALLOCATE CHANNEL d1 DEVICE TYPE disk;
ALLOCATE CHANNEL d2 DEVICE TYPE disk;
set newname for datafile 1 to ‘+DATA’;
set newname for datafile 2 to ‘+DATA’;
set newname for datafile 3 to ‘+DATA’;
set newname for datafile 4 to ‘+DATA’;
set newname for datafile 5 to ‘+DATA’;
SQL “ALTER DATABASE RENAME FILE ”+DATA/oraasm/onlinelog/group_3.268.1092813965”
to ”+DATA”” ;
SQL “ALTER DATABASE RENAME FILE ”+DATA/oraasm/onlinelog/group_2.266.1092813951”
to ”+DATA”” ;
SQL “ALTER DATABASE RENAME FILE ”+DATA/oraasm/onlinelog/group_1.265.1092813949”
to ”+DATA”” ;
SET UNTIL SEQUENCE 12; <— 11+1
RESTORE DATABASE;
SWITCH DATAFILE ALL;
RECOVER DATABASE;
}
SQL> startup nomount pfile='initasmora.ora';
ORACLE instance started.

Total System Global Area 1269366784 bytes
Fixed Size                  2227984 bytes
Variable Size             838861040 bytes
Database Buffers          419430400 bytes
Redo Buffers                8847360 bytes
SQL> alter database mount;

Database altered.

SQL>

set db name and id:
[oracle@asm asmora]$ . oraenv
ORACLE_SID = [asmora] ?
The Oracle base remains unchanged with value /u01/app/oracle
[oracle@asm asmora]$ nid target=sys dbname=asmora
DBNEWID: Release 19.0.0.0.0 – Production on Fri Jan 21 09:09:50 2022
Copyright (c) 1982, 2019, Oracle and/or its affiliates. All rights reserved.
Password:
Connected to database ORAASM (DBID=1977555372)
Connected to server version 19.3.0
Control Files in database:
+DATA/ASMORA/CONTROLFILE/current.262.1092813933
+DATA/ASMORA/CONTROLFILE/current.261.1092813933
Change database ID and database name ORAASM to ASMORA? (Y/[N]) => y
Proceeding with operation
Changing database ID from 1977555372 to 65466533
Changing database name from ORAASM to ASMORA
Control File +DATA/ASMORA/CONTROLFILE/current.262.1092813933 – modified
Control File +DATA/ASMORA/CONTROLFILE/current.261.1092813933 – modified
Datafile +DATA/ORAASM/DATAFILE/system.257.109281381 – dbid changed, wrote new name
Datafile +DATA/ORAASM/DATAFILE/sysaux.258.109281385 – dbid changed, wrote new name
Datafile +DATA/ORAASM/DATAFILE/undotbs1.259.109281386 – dbid changed, wrote new name
Datafile +DATA/ORAASM/86B637B62FE07A65E053F706E80A27CA/DATAFILE/system.270.109281441 – dbid changed, wrote new name
Datafile +DATA/ORAASM/86B637B62FE07A65E053F706E80A27CA/DATAFILE/sysaux.271.109281442 – dbid changed, wrote new name
Datafile +DATA/ORAASM/DATAFILE/users.260.109281386 – dbid changed, wrote new name
Datafile +DATA/ORAASM/86B637B62FE07A65E053F706E80A27CA/DATAFILE/undotbs1.272.109281442 – dbid changed, wrote new name
Datafile +DATA/ORAASM/D47CEAB72C2F2513E053867EA8C0538D/DATAFILE/system.276.109281537 – dbid changed, wrote new name
Datafile +DATA/ORAASM/D47CEAB72C2F2513E053867EA8C0538D/DATAFILE/sysaux.277.109281537 – dbid changed, wrote new name
Datafile +DATA/ORAASM/D47CEAB72C2F2513E053867EA8C0538D/DATAFILE/undotbs1.275.109281537 – dbid changed, wrote new name
Datafile +DATA/ORAASM/D47CEAB72C2F2513E053867EA8C0538D/DATAFILE/users.279.109281545 – dbid changed, wrote new name
Datafile +DATA/ORAASM/DATAFILE/tblspace.280.109304440 – dbid changed, wrote new name
Datafile +DATA/ORAASM/DATAFILE/tblspace.281.109304453 – dbid changed, wrote new name
Datafile +DATA/ORAASM/DATAFILE/test.282.109453879 – dbid changed, wrote new name
Datafile +DATA/ORAASM/TEMPFILE/temp.269.109281404 – dbid changed, wrote new name
Datafile +DATA/ORAASM/D47CB418C2B91B66E053867EA8C0C5A0/TEMPFILE/temp.273.109281445 – dbid changed, wrote new name
Datafile +DATA/ORAASM/D47CEAB72C2F2513E053867EA8C0538D/TEMPFILE/temp.278.109281541 – dbid changed, wrote new name
Control File +DATA/ASMORA/CONTROLFILE/current.262.1092813933 – dbid changed, wrote new name
Control File +DATA/ASMORA/CONTROLFILE/current.261.1092813933 – dbid changed, wrote new name
Instance shut down
Database name changed to ASMORA.
Modify parameter file and generate a new password file before restarting.
Database ID for database ASMORA changed to 65466533.
All previous backups and archived redo logs for this database are unusable.
Database is not aware of previous backups and archived logs in Recovery Area.
Database has been shutdown, open database with RESETLOGS option.
Succesfully changed database name and ID.
DBNEWID – Completed succesfully.
[oracle@asm asmora]$
Step 10: check the DB name and id
SQL> alter database open resetlogs;
Database altered.
SQL> select name, open_mode, db_unique_name, dbid from v$database;
NAME OPEN_MODE DB_UNIQUE_NAME DBID
ASMORA READ WRITE asmora 65466533
Thank you for giving your valuable time to read the above information.
If you want to be updated with all our articles send us the Invitation or Follow us: